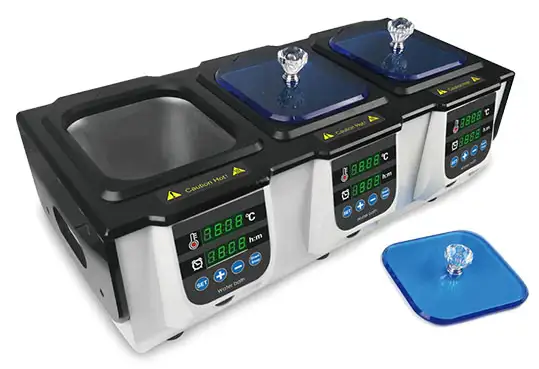
Water Bath BFA1BV4 (BBWA-304)
Thermostatic Water Bath- Sea, Air, Door to Door Shipping
- 1 Year Warranty
- US & European Standards
Specifications
| Model | BFA1BV4 |
| Timing range | 1~99h59min (0 is forever) |
| Temp. range | RT.+5°C~100°C |
| Temp. accuracy | ±0.5°C |
| Temp. Uniformity@37°C | ±0.5°C |
| Number of holes | 3 |
| Volume | 2Lx3 |
| Workspace | 140x126x95mmx3 |
| Voltage | AC 220V 50/60Hz |
| Power | 900W |
| Dimensions | W.510xD.290xH.240mm |
| Net weight | 6.7kgs |
Description
Thermostatic water bath is a temperature controllable thermostatic water bath experimental instrument, mainly used in large and medium-sized universities, industrial and mining enterprises and scientific research units for biological, biochemical, cell, bacteria and other liquid, solid compound culture.Features
Unique and novel appearance, small size, powerful functions.All surface that contact with water adopt stainless steel material and PC material, with strong corrosion resistance.Using a once punch-formed stainless steel inner liner, with unique sealing structure to eradicate water leakage; Three groups of water tanks postposition independent drain valves separately, can easily emptying the sewage after clean the Inner container.
Using microcomputer program PID automatic temperature control, uniform temperature control, high precision.
Built-in water level sensor, to prevent the hidden dangers of dry burning, safe and reliable.
Dual digital tube digital holographic display temperature and timing time, parameter display is accurate and intuitionistic, with beep alarm prompt function.
Operating Manual
Download1. Introduction
2. Specifications
2.1 The Normal Operation Condition
2.2 The Basic Parameters and Specifications
3. Basic operating instructions
3.1 Structure Description
3.2 Keyboard and Display Panel
3.3 Operation button description
4. Operation Guide
4.1 Time and temperature settings
4.2 Operation and stop
4.3 Temperature error calibration
5. Failure Analysis and Trouble Shooting
Appendix A:Wiring Diagram of BBWA-304
1. Introduction
BBWA-304 Thermostatic Water Bath is a temperature-controlled thermostatic bath biochemical equipment, It is mainly used for water baths of various liquid and solid compounds such as biology, biochemistry, cell, bacteria and so on in colleges and universities, industrial and mining enterprises and scientific research institutes, is an indispensable laboratory equipment for the close cultivation of plants, animals, microorganisms, genetic viruses, medicine, environmental protection and other scientific research, education and production departments.
This product has the following features:
Features:
1. Unique and novel appearance, small size, powerful functions.All surface that contact with water adopt stainless steel material and PC material, with strong corrosion resistance.
2. Using a once punch-formed stainless steel inner liner, with unique sealing structure to eradicate water leakage; Three groups of water tanks postposition independent drain valves separately, can easily emptying the sewage after clean the Inner container.
3. Using microcomputer program PID automatic temperature control, uniform temperature control, high precision.
4. Built-in water level sensor, to prevent the hidden dangers of dry burning,
safe and reliable.
5. Dual digital tube digital holographic display temperature and timing time, parameter display is accurate and intuitionistic, with beep alarm prompt function.
2. Specifications
2.1 The Normal Operation Condition
Ambient Temperature: 5C 35C
Relative Humidity: ≤70%
Power: AC220V~5A 50-60Hz
2.2 The Basic Parameters and Specifications
Model | BBWA-304 |
Temp. range | R.T.+5C ~100C |
Temp. accuracy | 0.5°C |
Temp. Uniformity @37°C | 0.5°C |
Number of holes | 3 |
Volume | 2Lx3 holes |
Inner dimension(mm) | 140x126x95x3 holes |
Voltage | AC 220V 50/60Hz |
power | 900W |
Dimension (WxDxH) | 510mmx290mmx240mm |
Net Weight | 6.7kgs |
Table 1
3. Basic operating instructions
This chapter mainly describes the instrument's mechanical structure, the keyboard and functions of each key, as well as preparations before power on. When using the instrument for the first time, you should be familiar with this chapter before turning on the instrument.
3.1 Structure Description
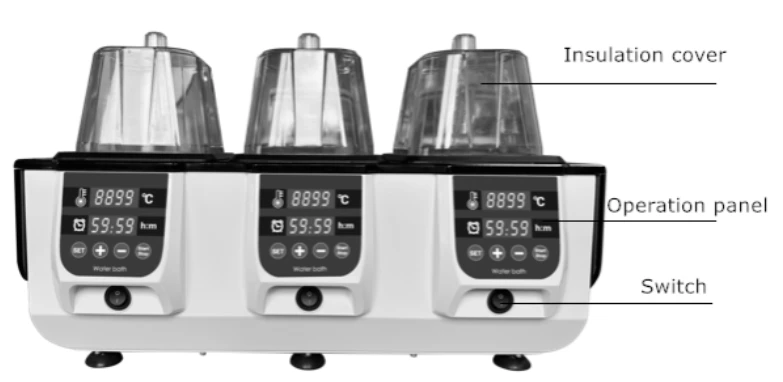
Figure 1
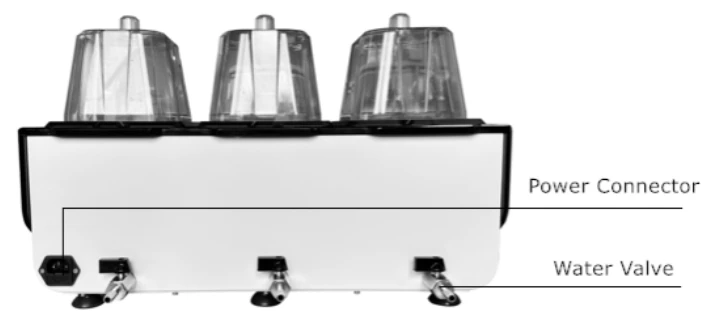
Figure 2
3.2 Keyboard and Display Panel
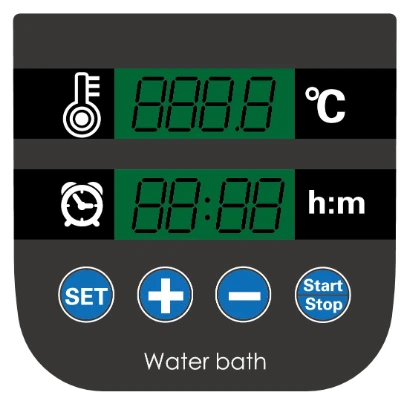
Figure 3
Display Panel:
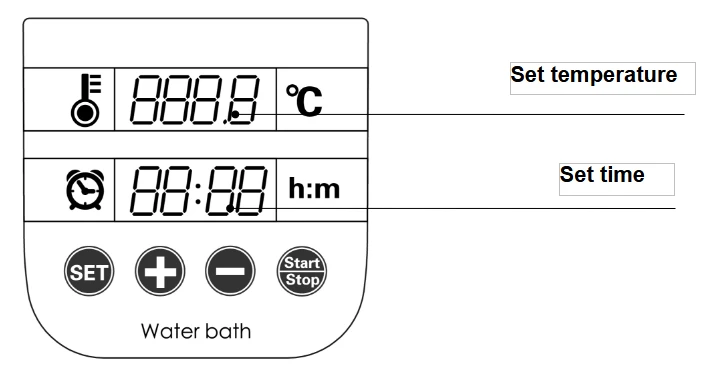
Figure 4
3.3 Operation button description
 Select the section in which the program needs to run.You can choose to set the temperature and time.
 Temperature and time setting keys, press this key to set the temperature and time.
 Temperature and time setting keys, press this key to set the temperature and time.
 Start/Stop key: While the program is not started,press this key to run the program. When the program is running, press this key to stop.
4. Operation Guide
4.1 Time and temperature settings
a) Add clean water to each of the three Inner containers. The water level must exceed the heating tube.
(Note! Do not press the temperature control switch before adding water. To avoid burning the heater tube, the heating tube will not work if the water level is too low.)
b) Press the power switch on the bottom of the corresponding sink. The display shows numbers "  " one after the other, as shown on the right. Accompanied by the "buzz" sound, the instrument enters the initial interface.
Set the temperature:
Press the "SET" button to select setting the temperature. As shown in the right figure, it is 38.0°C and the cursor flashes after the decimal point. Press the "+" or "-" key to increase or decrease the value of the set temperature, and increase or decrease in small numbers, ones digits, ten digits and hundreds digits in sequence.
Setting time:
Press the "SET" key to select setting the time. The modification principle is the same as the principle of temperature. If the time is set to 1 hour and 20 minutes, the operation is as follows: press the "+" key, and after reaching 1 hour 20 minutes according to the increase of the time setting value Release the "+" key, the instrument automatically confirms the setpoint and saves the setpoint.
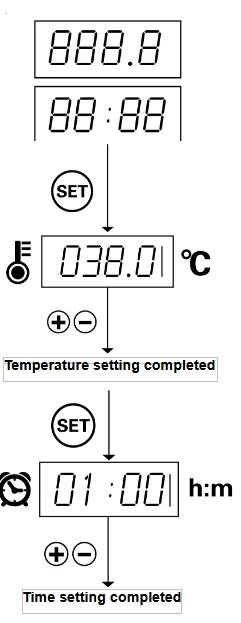
Figure 5
Note! When the time is set to 00:00, the time running value is ∞, and the instrument keeps constant temperature. while temp. kept at the setting Value.
4.2 Operation and stop
a) After the temperature and time are set, press the 
key to release it immediately, the instrument starts to run, the temperature starts to rise, and the instrument starts heating. At this time, the temperature display window shows the instantaneous temperature value. During the temperature increase process, the heating indicator light changes from gray to bright, and starts blinking. When the temperature in the water tank reaches the set temperature, the indicator light remains light on unchanged and the control enters a constant temperature state.

If you want to interrupt the operation, press to interrupt the operation. At this point should pay attention to safety and prevent high temperature burns.
When the instrument runs to the setted time, the alarm "di di di" three times, the time display window shows "OVER", which means the operation is over, that is, the end of the operation.

b) After the operation is completed, the instrument waits for an instruction at the end of the interface. Press the key at this time to reset the temperature or time. Press the START/STOP key directly to start the program according to the previously set temperature and time parameters.
4.3 Temperature error calibration
The temperature of this instrument has been calibrated before leaving the factory. However, if there is a deviation between the actual temperature and the displayed temperature due to some reasons, the temperature error can be corrected according to the following methods;
Attention! In order to ensure the accuracy of temperature, this instrument adopts two-point temperature calibration method, namely the two-point temperature synchronous linear calibration method of 50°C and 95°C. After two-point temperature linear calibration, the system ensures that the temperature accuracy of other temperature points is ≤±0.5°C.
When calibrating the temperature, the ambient temperature and the temperature of the module must be lower than 35°C.
The specific operation method is as follows:
a) After the instrument is turned on, enter the waiting interface. At this time, observe the temperature of the display window and confirm that the temperature value should be less than 45°C.
If the temperature is higher than 45°C, wait for the temperature to drop to 45°C, and then operate according to the following methods.
b) Put the thermometer in the sink (center position above the holder).
c) Long press the "+ " and "-" keys at the same time to enter the temperature calibration interface, see the figure on the right.
At this time, the time display window displays "  ", indicating that the temperature calibration program has been entered; the temperature display window displays the instant temperature, and it automatically starts to heat up to 50.0°C.
When the temperature rises to a constant temperature of 50.0°C, the decimal place starts to flash, waiting for the temperature calibration value of 50°C. After 20 minutes of constant temperature, read the actual temperature of the thermometer.
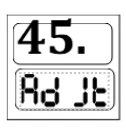
Attention! In order to ensure the accuracy of temperature calibration, it is recommended that users read the measured temperature after 20 minutes of constant temperature!
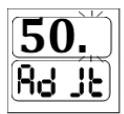
If the value read by the thermometer is 49.6°C, press the "+" or "-" key to modify the temperature value in the temperature display window to make the temperature value 49.6, and press the START/STOP key to confirm the input value.
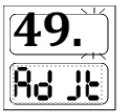
d) Then the instrument automatically heats up to 95°C, waits for the temperature calibration value to be input after the temperature is kept at 95°C. It is also required to read the measured temperature of the thermometer after 20 minutes of constant temperature.
Attention! In order to ensure the accuracy of temperature calibration, it is recommended that users read the actual measurement after 20 minutes of constant temperature!
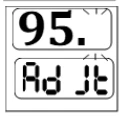
If the value read by the thermometer is 95.5°C, press the "+" or "-" key to modify the temperature value in the temperature display window to make the temperature value 95.5, and press the START/STOP key to confirm the input value.
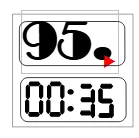
e) In this way, the two-point temperature calibration has been completed, exit the temperature calibration interface and return to the waiting interface.
Attention! During the two-point temperature calibration process, two points must be calibrated at once, otherwise the corrected temperature value will be invalid!
5. Failure Analysis and Trouble Shooting
Failure Analysis and Processing Procedures
No. | Phenomenon | Possible Causes | Processing Procedure |
1 | No signals on the display when power on. | No power | Check the power |
Broken fuse | Exchange fuse | ||
Broken switch | Exchange the switch | ||
Others | Contact with the seller | ||
2 | The actual and displayed temperatures are much different. | Broken sensor | Contact with the seller |
3 | The display shows "Err0" | Temp. sensor short circuit | Contact with the seller |
The display shows "Err1" | Temp. sensor short circuit | Contact with the seller | |
The display shows "Err2" | Water shortage | Add water | |
4 | Water bath is not heated | Broken sensor | Contact with the seller |
Heating tube is damaged | |||
Broken TE module | |||
5 | The key does not work | Broken keys | Contact with the seller |
Table 2
Appendix A:Wiring Diagram of BBWA-304
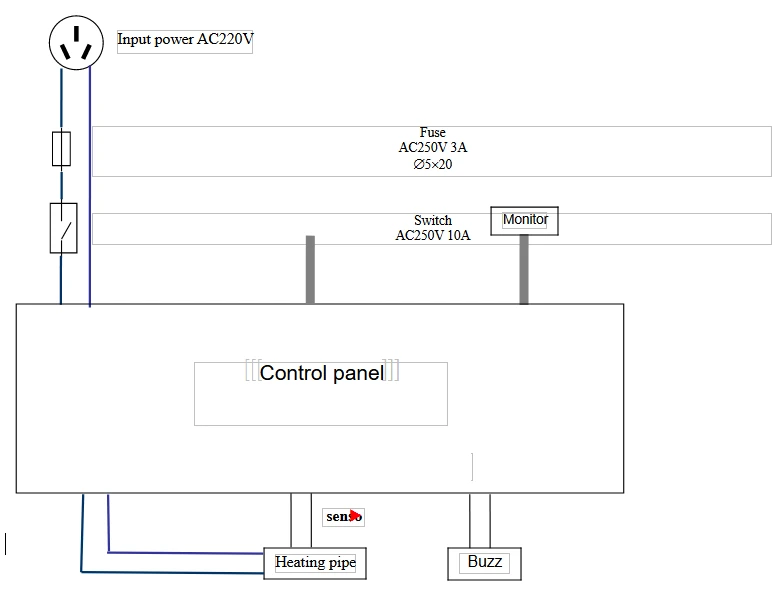
Figure 6


