Get Price
Kjeldahl Analyzer BKJS-202
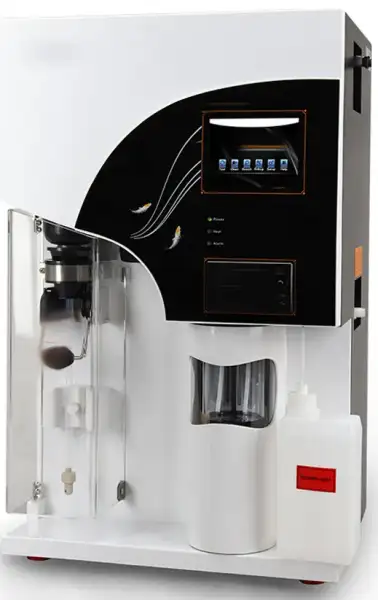
- Automatic distillation, titration, calculation, printing, drain and cleaning function, safety and saving-time.
- Visible titration cup design gives operator real-time control of the whole test process.
- Steam flow is controllable, satisfying different test requirements.
- Regent barrel enjoys fluid absence warning function, ensuring smooth test going.
 Get Quote
Specifications
| Model | BKJS-202 |
| Measuring range | 0.1 mg ~ 240 mg N |
| Analysis time | 3 ~ 8 min/sample |
| RSD | ≤ 0.5% |
| Recovery | ≥ 99.5% |
| Burette precision | 1.0 μL/step |
| Sample capacity | solid ≤ 5 g/sample, liquid ≤ 20 mL/sample |
| Water consumption in the distillation process | 1.5 L/min |
| Data storage capacity | 1800 groups |
| Power supply | 220 VAC ±10%, 50/60 Hz |
| Power | 2000 W |
| Net weight | 38 kg |
| Dimensions | 455 mm x 391 mm x 730 mm |
Features
Visible titration cup design gives operator real-time control of the whole test process.
Steam flow is controllable, satisfying different test requirements.
Regent barrel enjoys fluid absence warning function, ensuring smooth test going.
High-precision charging pump and titration system ensure test results accuracy.
The large LCD touch screen gives visual operation and abundant information, enabling the user to have a good command of it.
USB or RS485 interface is optional for PC connection. Distilled liquid temperature is detected real time. Emergency stop against temp anomaly.
Double distillation model meets different experiments, to retard the speed of acid-base reaction.
Digestion tube fast drain function is used to avoid operator touch distilled hot reagents,
protecting operators.
Printer is built in.
Complete microcomputer control: Automatic completion of distillation, titration, calculation,
printing, waste discharge and multiple protections,i.e.failure self-detection,hints of condensed water shortage, displacement of safety door and digestion tube and so on.
Large LCD Touch Screen Panel:5.6 inch LCD touch screen panel gives visual operation
and abundant information,enabling users to have a good command of it.
Complete compatible design
Compatible with congeneric products perfectly
Compatible with φ42mm digestion tube
Titration while distillation, enhances the efficiency rapidly.
User friendly design, color touch screen, easy for operating
Faster ARM system, faster operating rate.
Applications

Food

Tobacco

Feed

Environment
Operating Manuals
 Download Manual (PDF)
1. Safety
1.1 Overview
1.2 Safety
1.3 Guidance for waste disposal
1.4 Quality guarantee policy
2. Summary
2.1 Application
2.2 Principles
2.3 Operating Flow Chart
3. Main performance
3.1 Technical parameters
3.2 Use conditions
4. Name of instrument components
5. Device installation methods
5.1 Inspection before installation
5.2 Installation conditions
5.3 Installation
6. Function introduction
6.1 Function of operating panel
6.2 The functions of the buttons of the printer are as follows
6.3 Safety performance
6.4 Operation of device functions
6.5 Operation of function interface
7. Sample test
7.1 Reagent preparation
7.2 Reference value for test
7.3 Test parameter setup
7.4 Device calibration
1. Safety
1.1 Overview
This operating manual is prepared for the laboratory instrument operators. Please read this manual carefully before using the instrument, and conduct the operation according to the manual. Personnel who are not familiar with the instrument operation or safety information shall not operate the instrument.
This instrument adopts the current most advanced technology for design and manufacturing. But the improper use of instrument will cause the potential safety hazard.
The instrument manufacturer has made the assessment on the possible residual hazard:
Inexperienced personnel operate the instrument
Failure to operate the instrument according to the normal regulations
There is the warning information in this operating manual, and operators shall know these residual hazards.
1.2 Safety
 Warning: This instrument is only used for the laboratory. If the instrument is damaged due to the failure of conducting the operation according to the manual during the use, the manufacturer refuses to bear all consequences.
Warning: If the failure of using the instrument properly or conducting the operation according to the operating manual causes the consequences, the company will not bear the safety problem of instrument use.
Warning: The failure of operating the instrument as required by this manual will weaken the safety performance of the instrument.
Warning: Please conduct the treatment of various solutions used in the test according to the laboratory safety regulations. The operators shall wear the rubber gloves, lab coats and goggles.
Warning: Oral take-in of boric acid will cause the acute poisoning, which is mainly embodied in gastrointestinal symptoms, nausea, emesis,
abdominal pain, diarrhea, etc., and then dehydration, shock, coma or acute renal failure, or high fever, liver and kidney damage and convulsions, and even cause death if serious. It is easily absorbed by the damaged skin and causes the poisoning. Chronic poisoning Long-term absorption of small amount of boric acid in gastrointestinal tract or skin will lead to mild digestive tract symptoms, dermatitis, baldness and liver and kidney damage.
Warning: Sodium hydroxide has intense irritation and corrosivity. The powder or smog will irritate the eyes and respiratory tract, and corrode nasal
septum. Direct contact of skin or eyes with sodium hydroxide may cause burns, and accidental take-in can cause gastrointestinal burns, mucosal erosion, bleeding and shock.
Warning: Sulfuric acid (96-98%) has intense irritation and corrosive effect upon the skin, mucosa and other organs. Vapor or mist may cause
conjunctivitis, conjunctival edema, and corneal opacity, and consequently blindness; it may cause respiratory irritation, and may cause dyspnea and pulmonary edema in severe cases. High concentration may cause the laryngospasm or glottic edema, and finally death by suffocation. Oral take-in may cause digestive tract burns and thus necrosis. It may cause gastric perforation, peritonitis, renal damage, shock, etc. in severe cases.
Warning: The temperature of digestive tract will reach 100°C during the experiment. After completing the distillation, take the testing tube out with test tube holder for avoiding scald.
Warning: Please use the power line provided by Biolab. Other power lines will affect the safety performance of the instrument.
Warning: This instrument is equipped with the special grounding power plug for preventing electric shock. Please use the grounding receptacle.
Warning: Electric shock hazard only professional and qualified persons are permitted to open the machine cover and the panel.
Warning: The instrument shall not be used under the environment with the potential explosion risk.
Warning: In the case of not conflicting with the local waste disposal regulations, waste liquor can be directly discharged into the sewer. Make sure
that the exhaust line is not bent or doesn't keep the upward flow and is as short as possible, and the outlet end shall not be lower than the liquid level of the sewer. (exhausting hot water below cold water will produce the noise). The pipeline shall be fixed, because the waste liquid discharged from the system has certain pressure.
Warning: The power switch in the lower right side of the instrument can be reached easily at any time, making sure that the power can be turned off at any time.
Notes: Don't touch or open the protective door during the instrument operation.
Notes: Make sure that the liquid solution will not contact the power line and electric parts inside the instrument.
Notes: Stop using the instrument in the case of failure, and timely contact the nearby Biolab service center.
Notes: This instrument shall be repaired by the personnel authorized by Biolab. Biolab recommends using the original spare parts. If the spare parts from other sources are used, the quality guarantee will be invalid.
Notes: The instrument is designed and tested according to EU standard (CE). To guarantee the continuous conformance to the standard, the
instrument can only be connected with the equipment meeting CE requirements.
Notes: The unboxing, assembly and installation of the instrument shall be completed by the personnel authorized by Biolab.
1.3 Guidance for waste disposal
 It is not allowed to discard the electronic devices together with the non-classified general waste. Improper disposal will produce the damage to the environment and human health. Please refer to the local waste disposal regulations for collection and disposal of the equipment.
1.4 Quality guarantee policy
The quality guarantee is generally specified in the purchasing order or contract, and is only applicable to:
The user shall abide by all written explanations and documents of Biolab
The equipment shall be installed, maintained, adjusted and calibrated according to the methods described and recommended in the documents.
The equipment is not used for other purposes beyond those specified byBiolab.
The equipment is not refitted or repaired with spare parts not from Biolab, and is not repaired by the personnel beyond those authorized by Biolab.
2. Summary
2.1 Application
Automatic Kjeldahl Analyzer is an automatic, smart device determining nitrogen content based on Kjeldahl method. It can be widely used in food processing, feed production, tobacco, livestock, soil fertility, environmental monitoring, medicine, agriculture, scientific research, teaching, quality control and other fields for the test of nitrogen or protein content with respect of macro and semimicro samples and can also be used for the test of ammonium, volatile fatty acid / alkali, and so on. Upon test of samples by using Kjeldahl method, the processes of digestion, distillation and titration are required, wherein distillation and titration are main determination processes with respect to Automatic Kjeldahl Analyzer.
Automatic Kjeldahl Analyzer is an automatic nitrogen determination system integrating distillation and titration based on classic Kjeldahl method; the instrument provides great convenience for lab staff in determining nitrogen-protein. It's safe, reliable, simple for use and time-saving. A friendly user interface in English allows easy operation and displays abundant information, enabling users to quickly master the use of the instrument.
2.2 Principles
According to Kjeldahl principles, the determination requires three steps, which are digestion, distillation and titration.

Figure 1
Automatic Kjeldahl Analyzer can automatically complete the processes of distillation and titration. Upon the samples to be determined is fully digested, it's subjected to the following chemical reactions on the instrument:

The ammonia gas emitted during the reaction, together with the steam, is collected in the receiving cup added with boric acid absorbing solution (containing mixed indicator) after condensed by a condensing tube. Then the automatic titrator carries on titration and record the volume of consumed standard titration acid. Based on the volume of consumed standard titration acid, the calculating system calculates the nitrogen content and crude protein content based on the following formulae.
Nitrogen content:
Crude protein content:

Wherein: 
M=molar concentration of titration acid (mol/L);
W=sample weight (g);
V0= volume of consumed standard titration acid during blank sample titration (mL);
V= volume of consumed standard titration acid during sample titration (mL);
C=conversion coefficient for crude protein.
2.3 Operating Flow Chart

Figure 2
3. Main performance
3.1 Technical parameters
a. Sample capacity: solid≤5g, liquid≤20mL;
b. Measuring range: 0.1mg~200mg nitrogen;
c. Analysis time: 5~10 min/sample;
d. Recovery: ≥99.5%;
e. Titration accuracy: 1.0μL/step;
f. Repeated errors(RSD): ≤0.5%;
g. Data storage capacity: 1,800 pieces;
h. Consumption of condensate water: 1.5L/min;
i. External interface: USB, RS485;
j. Dimension size (length x width x height): 455mm x 391mm x 730mm;
k. Net weight: 38kg.
3.2 Use conditions
a. Power supply: 220 VAC ±10% 50Hz;
b. Rated power: 2KW;
c. Condensate water pressure: >0.02Mpa; flow: >1.5L/min;
d. Condensate water temperature: ≤ 20°C;
e. Ambient temperature: 10°C~35°C.
4. Name of instrument components
The instrument is a system conducting automatic distillation, titration, calculation, printing, discharge and cleaning on the fully-digested sample and capable of displaying operating procedures, with a microcomputer calculating results and a printer outputting data. The system substantially consists of microcomputer controller, steam generator, distilling system, alkali adding system, boric acid adding system, titrating system, micro-printing, discharge system and cleaning system.
The structure of the instrument is composed as shown in the figure below:

Figure 3
1. Label 2. "Security door in-place" detector 3. Anti-splash bottle 4. Condensate water interface 5. Distilling head 6. Fixed holder for digestion tube 7. Digestion tube
8. "Digestion tube in-place" detector 9. Security door 10. Waste receiving tank 11.
Touch screen 12. Panel 13. Printer 14. Receiving cup 15. Titration acid tank

Figure 4
16. Condensate water inlet 17. Condensate water outlet 18. Discharge port

Figure 5
19. Power switch 20. Power plug 21. RS485 interface 22. USB interface 23. Distilled water level detection interface 24. Boric acid level detection interface 25. Alkali solution level detection interface 26. Alkali inlet 27. Boric acid inlet 28. Distilled water inlet

Figure 6
1. Power indicator light 2. Heating indicator light 3. Alarm indicator light
5. Device installation methods
5.1 Inspection before installation
After the package is removed, check the instrument and its fittings as specified in the appended packing list and inspect for damage. In case of damage, immediately contact the manufacturer. (Please retain the damaged components)
5.2 Installation conditions
a. The device shall avoid direct sun radiation and places without extreme temperature or moisture. In general, the room temperature shall be kept between 10°C and 35°C.
b. The device shall be installed at places adjacent to water source and drain tank and
provided with power sockets; the distance between the location of water supply valve and power supply and the device shall be less than one meter for convenience of operation.
c. The water supply shall comply with requirements of water pressure and water temperature.
d. The drain tank shall at least be 50cm lower than discharge port of the device to ensure smooth natural discharge.
e. The power arrangement shall comply with requirements of power supply. It shall be provided with ground lead, and separate power switches and safeguards to ensure users' safety.
f. The device shall be installed far away from large electrical equipments, and the operating location shall be free of quake, corrosive liquid and strong electromagnetic field interference.
5.3 Installation
Lay the device flat on the test bench, leaving a distance of at least 20cm between the back side of the device and the wall. Arrange a power socket within a distance of one meter from the device, and meanwhile provide air-break switch, anti-creeping switch and reliable grounding.
Connect pipelines according to each pipe interface listed in the back elevation of the device. The condensate water inlet (16) is connected to the tap water valve; condensate water outlet (17)discharge port (18) are respectively connected to the drain tank through the pipe drains and discharge pipe to ensure smooth discharge.
6. Function introduction
6.1 Function of operating panel
a. The display: 24-color touch display.
b. Power indicator ligh(t green): it shows power supply status; the light is on upon the
device is powered on. When the light is on, it means the device enters into standby status.
c. Heating indicator light(red): When the light is on, it means the water in the steam
generator is being heated and the light turns off in non-operating status.
d. Alarm indicator light(yellow): When the light is on, it means the failure of system occurs or certain necessary conditions are not met upon distillation and the light will be off when the system is in efficient working order. Note: the display will simultaneously show alarming words and sound under alarming status.
6.2 The functions of the buttons of the printer are as follows
a. [SEL] button
Upon pressing this button, if the operating indicator light of the printer is on, it means the printer is in line; if the light is off, it means the printer is off line. If printing is desired, please maintain the print in line;
b. [LF] button
When paper needs to be reloaded, press [SEL] button to turn off the operating indicator light of the printer; press [LF] button to make the printer automatically loading paper; press this button again, the printer will stop loading paper; at last press [SEL] again to turn on the operating indicator light of the printer, and the paper loading process of the printer completes.
6.3 Safety performance
Protection upon condensate water supply is suspended: where the tap water supply is cut off or suspended as the device is running, the device will automatically stops operation to prevent spraying of heating steam scalding people.
Protection upon steam generator lacks water: the steam generator is provided with water refilling functions; when the tank supplying the steam generator is lacking water, the steam generator will automatically stops operation to prevent the damage from heating without water.
Protection of security door: a transparent anti-corrosive security door enables observation of the whole process of distillation; if the security door is not closed upon operation, the device will lock up the operating button to provide safety protection.
Protection upon steam generator is under overpressure: the steam generator has protective functions against overpressure, in case of overpressure, the pressure sensor will automatically cut off the power supply to prevent explosion due to overpressure.
Protection upon test tube is not in place: when the system detects that test tube is not in place during operation, the device will stop and make alarm to prevent overflow of alkali solution.
Level protection of solution tank: the solution tank is provided with level sensors; when the level of any of the acid tank, alkali tank or water tank is so low that refilling is needed, the system will make alarm.
6.4 Operation of device functions
The operations of functions attainable by the device in testing samples are as follows: diluting, adding reagent, distilling, titrating, discharging waste, result calculating and printing.
Diluting: add distilled water into the digested sample in the digestion tube to dilute. Adding reagent: includes adding of alkali solution, boric acid absorption solution, titration acid, etc.
Distilling: add hot steam into the sample in the digestion tube to distill the ammonia of sample.
Titrating:titrate absorption liquid when distilling or complete distilling.
Discharge waste: discharge wastes in the digestion tube, receiving cup.
Result calculating and printing: calculate the result and print it according to operation.
6.5 Operation of function interface
Main interface
After the startup animation, six functions will be displayed, including [Test], [Clean], [Search], [Debug], [Setup], [Help]. Press corresponding icon to enter respective interface.

Figure 7
Press [Test], the menu system will automatically enter into operating mode interface, including two test modes, i.e., automatic test and manual tests.
[Automatic test] After setting experimental parameters, the device will carry out automatic experimental test.
[Manual test] It's used to step by step carry out experimental test and debug and test with respect to each function of the device.

Figure 8
Touch and choose automatic test mode to enter corresponding mode interface, wherein four functions can be attained as follows:
1. Choose type
2. Input parameters
3. Commence experiment
4. Save mode
1) Automatic test:
The system initially displays the interface for optional types, and there're ten optional types in total. Choose the experiment type according to the samples.
 Automatic test:")
Figure 9
Choose the right type. For example, choose [Convention] to enter parameter input interface, wherein last experiment data will be displayed. A keyboard pop-up appears upon click on each data region, and corresponding data may be input as required. Press [OK], and enters into experiment start interface; press [Back], and returns to the last interface.
 Automatic test:")
Figure 10
Sample Number: it refers to as serial number of sample and shall automatically add one after each sample.
Sample Weight: it refers to as weight of test sample.
Titrable Acid Concentration: it refers to as concentration of test titrable acid. Blank Volume: it refers to as volume of sample blank.
Preheating Time: it refers to as time for beforehand distillation under the pattern of nitric nitrogen.
Waiting Time: it refers to as time for waiting after beforehand distillation under the pattern of nitric nitrogen.
Boric Acid: it refers to as amount of boric acid added during test. Dilution Water: it refers to as amount of dilution water added during test. Alkali Liquor: it refers to as amount of alkali liquor added during test.
Distillation: it refers to as time for distillation during test.
Upon choosing [User mode], enter the following interface. [User mode] allows users to save 100 kinds of measurement mode in the process of measurement for convenience of future measurement of similar experiments. It can provides previous information, such as concentration of titration acid, volume of diluting water, volume of boric acid, volume of alkali solution and distilling duration. It can also be corrected according to desired information by clicking the data region. The sample No. can be chosen via the left and right triangle icon, as well as keyboard input. The illustration shows the user has chosen mode 1, and input parameters such as sample weight, blank volume, protein coefficient, etc.
 Automatic test:")
Figure 11
After inputting corresponding experimental parameters, press [OK] to enter experiment interface and start the experiment. The steps of experiment are respectively: add diluting water, add boric acid, add alkali, distill, titrate, calculate and print, discharge, digestion tube cleaning and receiving cup cleaning, of there the functions of digestion tube cleaning and receiving cup cleaning are set up as required in [Setup] interface before the experiment starts.
To ensure the safety of the experiment, the system collects and displays all aspects of status information with respect to the device on a real-time basis during the test process, such as level of steam generator, security door in place, presence of condensate water, digestion tube in place, presence of solution in solution tank, etc. If any abnormal condition is detected, the task will be suspended. For example, upon lack of condensate water or digestion tube not-in-place, the following interface will appear.
 Automatic test:")
Figure 12
The system displays current operating items and real-time values on a real-time basis. When the set value is reached, the system will stop the current function and turn to the next experimental function. If the parameter is set with value "0", then the system will not start corresponding function. Taking adding boric acid as an example, when a parameter is set, the system will start filling of boric acid.
 Automatic test:")
Figure 13
When a parameter is set, after filling of boric acid is completed, the system will start filling of diluting water and display that diluting water is being added.
Note: the dilution function of the device is to dilute the digested sample in the digestion tube by adding distilled water.
 Automatic test:")
Figure 14
When a parameter is set, after filling of diluting water is completed, the system will start filling of alkali. After alkali adding, it will add 10ml distilled water more, the interface.
 Automatic test:")
Figure 15
During foregoing operation, the experiment can be suspended at any time by the operator as necessary. The experiment can be either continued or quitted after suspension. If the alkali is not sufficient due to certain causes, then the experiment can be suspended upon distillation. Press [Add alkali] to add fixed volume of alkali solution. A 5ml solution can be added for each pressing of [Add alkali]. Press [Continue] to continue the experiment.
 Automatic test:")
Figure 16
After completion of adding alkali, the system will start the distillation process. If the time parameter of distillation is set 0, then the system will not start the distillation process; if certain parameter is set, the distillation process will be automatically started; meanwhile the suspend or back can be attained.
 Automatic test:")
Figure 17
During the process of distillation, in case of abnormal conditions, it will be notified, such as overheating of ammonia water, See Fig.5.5.12, overheating of steam generator.
 Automatic test:")
Figure 18
 Automatic test:")
Figure 19
Upon the system enters into the process of titration.
 Automatic test:")
Figure 20
In case discharging and cleaning are set in [Setup], then system will automatically discharge and clean after completion of titration. The cleaning of digestion tube and receiving cup will be respectively carried out following the discharging of the same. The system can not suspend or back upon commencement of cleaning or discharging till the completion of cleaning or discharging.
 Automatic test:")
Figure 21
Cleaning will be automatically started upon completion of discharging. The digestion tube will first be cleaned.
 Automatic test:")
Figure 22
The receiving cup will be cleaned following the completion of digestion tube cleaning.
 Automatic test:")
Figure 23
After completion of cleaning, it will enter into the titration result interface, wherein the titrated volume, nitrogen content and protein content will be simultaneously displayed. Under such interface, printing and saving mode can be carried out.
 Automatic test:")
Figure 24
In case of blank experiment, the titration result interface will only display titrated volume.
 Automatic test:")
Figure 25
Choosing save mode can save the present experiment mode, with interface cuing user No. input and showing dialog box for input.
 Automatic test:")
Figure 26
After number input, press [OK] to save or press [Back] to return to the previous interface. The user No. will be automatically generated, and can be modified.
 Automatic test:")
Figure 27
After completion of saving mode, it will automatically return to the parameter input interface and enter into standby status.
2) Manual test
Upon touching and choosing the manual test mode in the interface in Fig 8, it will enter into the parameter test interface.
 Manual test")
Figure 28
After inputting corresponding parameters, press [OK] to enter the following interface, wherein the following functions can be manually attained: add diluting water, add boric acid, add alkali, distill, titrate, calculate and print, discharge, digestion tube clean, receiving cup clean, with each step manually manipulated.
 Manual test")
Figure 29
For example, choose Add diluting water (the triangle icon is directed to the present option), input corresponding volume, and touch to start adding of diluting water. After the completion of adding, it will automatically return to the present interface, ready for choice of other functions. All functions of this interface are optional.
 Manual test")
Figure 30
During the experiment, the system will collect all aspects of status information with respect to the device on a real-time basis similar to automatic test.
Note: each step of manual test will display the ongoing status and content of experiment result similar to automatic test.
3) Cleaning
Choose [Cleaning], with interface as shown in the figure, including Digestion tube cleaning, Receiving cup cleaning, Alkali pipeline cleaning, Boric acid pipeline cleaning, Acid washing, Steam bottle evacuation. Choose Cleaning to start cleaning.
![3) Cleaning, Choose [Cleaning], with interface as shown in the figure, including Digestion tube cleaning, Receiving cup](https://biolabscientific.com/content/manual/20260421002/3-Cleaning-i37-Biolab.webp "3) Cleaning")
Figure 31
For example, choose [Receiving cup cleaning], click on [Receiving cup cleaning] to start cleaning of receiving cup; the interface displays "cleaning receiving cup "; upon touching [Back], the cleaning stops and the interface returns to cleaning function interface.
![3) Cleaning, Choose [Cleaning], with interface as shown in the figure, including Digestion tube cleaning, Receiving cup](https://biolabscientific.com/content/manual/20260421002/3-Cleaning-i38-Biolab.webp "3) Cleaning")
Figure 32
Search
Choose [Search] to enter into search interface for historical record, input sample No. to display corresponding experiment results and storage time. In case no reference number is input, the system will display the record of latest experiment; the system will display corresponding record following manual input of reference number (Range of sample No.: 1-1800). [Print] operation is available; click on Print to print data of corresponding reference number Clicking on menu icon can exit search interface and return to the main interface. Also, you can click on other icons in the tool bar as necessary to enter into other function interfaces.
![3) Cleaning, Choose [Cleaning], with interface as shown in the figure, including Digestion tube cleaning, Receiving cup](https://biolabscientific.com/content/manual/20260421002/3-Cleaning-i39-Biolab.webp "3) Cleaning")
Figure 33
Debug
Choose [Debug] to enter into the debug interface, which tests all electronic parts within the device. With respect to the back of corresponding button, √ indicates initiation, x indicates closure; the white icon represents detection of level sensors, etc.
√ and x indicate the present working status of sensors. For example, √ appears upon detection of security door in place, otherwise x appears. After completion of choosing, the debug of the device commences. See Fig. 5.5.28. Choose [Back] to return to the previous interface.
Note: the consequences arising from unauthorized use of debug interface will be borne by the user; this interface is only for use by technicians with the manufacturer.
![3) Cleaning, Choose [Cleaning], with interface as shown in the figure, including Digestion tube cleaning, Receiving cup](https://biolabscientific.com/content/manual/20260421002/3-Cleaning-i40-Biolab.webp "3) Cleaning")
Figure 34
Setup
Choose [Setup] to enter Setup interface, wherein setup of the following functions can be attained:
[Steam flow] can choose the steam flow rate.
[Water flow test] determines whether to detect the presence of condensate water during the test.
[Distillation mode] provides two optional distillation modes: distillation before adding alkali and distillation after adding alkali.
[Titration mode] the system titration mode, including two optional titration modes: distillation before titration and distillation accompany with titration.
[Discharge from digestion tube] with respect to automatic test which determines whether to carry out discharge from digestion tube after titration.
[Digestion tube cleaning] with respect to automatic test which determines whether to carry out digestion tube cleaning after titration.
[Receiving cup cleaning] with respect to automatic test which determines whether to carry out receiving cup cleaning after titration.
[Print mode] provides two print modes: simple print and ordinary print. [Color calibration] is used for titration sensor calibration.
[Color trimming] is to adjust the color value. [Titrator calibration] is conducted by titrator.
[Calibration coefficient] upon measuring samples, there will be system errors due to connection to different systems. To ensure accurate measurement, a deviation calibration coefficient is established to enable calibration by the user.
[System time] is used to set up system time. [Historical data] reset storage data.
[Data transmission] communicate with upper computer by USB or RS485.
Set up corresponding function in this interface before the commencement of experimental test.
![[Calibration coefficient] upon measuring samples, there will be system errors due to connection to different systems. To](https://biolabscientific.com/content/manual/20260421002/Calibration-coefficient-upon-measuring-samples-i41-Biolab.webp "[Calibration coefficient] upon measuring samples")
Figure 35
Steam flow
Choose [Steam flow] to enter into the interface for choosing parameters, wherein dialog box for data of steam flow rate appears. Choose right parameter, click on [OK] to continue; [Back] to return to initial Setup interface.
![[Calibration coefficient] upon measuring samples, there will be system errors due to connection to different systems. To](https://biolabscientific.com/content/manual/20260421002/Calibration-coefficient-upon-measuring-samples-i42-Biolab.webp "[Calibration coefficient] upon measuring samples")
Figure 36
Water flow test
Choose [Water flow test] to display corresponding dialog box. Choosing [Yes], [OK] means the system will suspend the experiment in case no water is present in the condensate water tube during the test till the presence of water. Choosing [No], [OK] means there will be no alarm regardless of presence of water. Pressing [Back] will maintain the original setting and enter into the original Setup interface.
![[Calibration coefficient] upon measuring samples, there will be system errors due to connection to different systems. To](https://biolabscientific.com/content/manual/20260421002/Calibration-coefficient-upon-measuring-samples-i43-Biolab.webp "[Calibration coefficient] upon measuring samples")
Figure 37
Distillation mode
Choose [Distillation mode] to enter into choice interface, wherein there're two optional modes, distillation before adding alkali and distillation after adding alkali. For example, choose distillation after adding alkali, press [OK] to complete setup; choose [Back] to maintain original default mode return to the initial Setup interface.
![[Calibration coefficient] upon measuring samples, there will be system errors due to connection to different systems. To](https://biolabscientific.com/content/manual/20260421002/Calibration-coefficient-upon-measuring-samples-i44-Biolab.webp "[Calibration coefficient] upon measuring samples")
Figure 38
Titration mode
Choose [titration mode] to enter into choice interface, choose [Yes] to execute distillation accompany with titration, choose [No] to execute distillation before titration.
![[Calibration coefficient] upon measuring samples, there will be system errors due to connection to different systems. To](https://biolabscientific.com/content/manual/20260421002/Calibration-coefficient-upon-measuring-samples-i45-Biolab.webp "[Calibration coefficient] upon measuring samples")
Figure 39
Discharge from digestion tube
Choose [Discharge from digestion tube] to enter into choice interface; choose [Yes], [OK] to enable discharge from digestion tube after completion of test; choose [No], [OK] to disable discharge from digestion tube after completion of test; choose [Back] to maintain the original setting and return to the Setup interface.
![[Calibration coefficient] upon measuring samples, there will be system errors due to connection to different systems. To](https://biolabscientific.com/content/manual/20260421002/Calibration-coefficient-upon-measuring-samples-i46-Biolab.webp "[Calibration coefficient] upon measuring samples")
Figure 40
Digestion tube cleaning
Choose [Digestion tube cleaning] to enter into choice interface; choose [Yes], [OK] to enable digestion tube cleaning after completion of test; choose [No], [OK] to disable digestion tube cleaning after completion of test; choose [Back] to maintain the original setting and return to the Setup interface.
![[Calibration coefficient] upon measuring samples, there will be system errors due to connection to different systems. To](https://biolabscientific.com/content/manual/20260421002/Calibration-coefficient-upon-measuring-samples-i47-Biolab.webp "[Calibration coefficient] upon measuring samples")
Figure 41
Receiving cup cleaning
Choose [Receiving cup cleaning]to enter into choice interface; choose [Yes], [OK] to enable receiving cup cleaning after completion of test; choose [No], [OK] to disable receiving cup cleaning after completion of test; choose [Back] to maintain the original setting and return to the Setup interface.
![[Calibration coefficient] upon measuring samples, there will be system errors due to connection to different systems. To](https://biolabscientific.com/content/manual/20260421002/Calibration-coefficient-upon-measuring-samples-i48-Biolab.webp "[Calibration coefficient] upon measuring samples")
Figure 42
Print mode
Choose [Print mode] to enter into choice interface,choose[simple print],the system will print related parameters one by one; choose [ordinary print],the system will just print test results.
![[Calibration coefficient] upon measuring samples, there will be system errors due to connection to different systems. To](https://biolabscientific.com/content/manual/20260421002/Calibration-coefficient-upon-measuring-samples-i49-Biolab.webp "[Calibration coefficient] upon measuring samples")
Figure 43
Color calibration
Choose [Color calibration] to enter into color calibration interface, wherein the color calibration is carried out with respect to the recognition of titration end-point color change. See Fig. 5.5.38 for the interface.
Note: the consequences arising from unauthorized use of debug interface will be borne by the user; this interface is only for use by technicians with the manufacturer.
![[Calibration coefficient] upon measuring samples, there will be system errors due to connection to different systems. To](https://biolabscientific.com/content/manual/20260421002/Calibration-coefficient-upon-measuring-samples-i50-Biolab.webp "[Calibration coefficient] upon measuring samples")
Figure 44
Color trimming
Choose [Color trimming] to enter into color trimming interface , Press[-] or[+] can adjust the date,after completed, press [OK] to save, otherwise, press [Back] to exit.
![[Calibration coefficient] upon measuring samples, there will be system errors due to connection to different systems. To](https://biolabscientific.com/content/manual/20260421002/Calibration-coefficient-upon-measuring-samples-i51-Biolab.webp "[Calibration coefficient] upon measuring samples")
Figure 45
Titrator calibration
Make the special receiver equipment ready before titrator calibration. Choose [Start] with respect to [Titrator calibration], the titrator to absorb fluid first, after alarming, the titrator pushes out a fixed volume of solution to the receiver equipment; then the input data of actually pushed out volume is obtained through weighing. Press [OK] to complete the process of the titrator calibration. In case of choosing [No], [OK] or [Back], it will maintain the original setting and enter into the initial Setup interface. See Fig. 5.5.40.
Note: the consequences arising from unauthorized use of debug interface will be borne by the user; this interface is only for use by technicians with the manufacturer.
![[Calibration coefficient] upon measuring samples, there will be system errors due to connection to different systems. To](https://biolabscientific.com/content/manual/20260421002/Calibration-coefficient-upon-measuring-samples-i52-Biolab.webp "[Calibration coefficient] upon measuring samples")
Figure 46
Calibration coefficient
Choose [Calibration coefficient] to enter into the following interface, wherein corresponding calibration coefficient is to be input. Press [OK] to enable calculation in the process of test based on the input coefficient.
![[Calibration coefficient] upon measuring samples, there will be system errors due to connection to different systems. To](https://biolabscientific.com/content/manual/20260421002/Calibration-coefficient-upon-measuring-samples-i53-Biolab.webp "[Calibration coefficient] upon measuring samples")
Figure 47
System time
Choose [System time] to display dialog box for time setting, and input right time. Press [OK] to complete time setting; [Back] to maintain original setting and enter into the original Setup interface.
![[Calibration coefficient] upon measuring samples, there will be system errors due to connection to different systems. To](https://biolabscientific.com/content/manual/20260421002/Calibration-coefficient-upon-measuring-samples-i54-Biolab.webp "[Calibration coefficient] upon measuring samples")
Figure 48
Historical data
Choose [Historical data] to enter into choice interface, choose [OK] to delete all historical date, choose [Back] to exit. See Fig. 5.5.43.
Note: Once reset historical data it can't recover, please careful operate carefully.
![[Calibration coefficient] upon measuring samples, there will be system errors due to connection to different systems. To](https://biolabscientific.com/content/manual/20260421002/Calibration-coefficient-upon-measuring-samples-i55-Biolab.webp "[Calibration coefficient] upon measuring samples")
Figure 49
Data transmission
Choose [Data transmission] to enter into choice interface, choose [USB], the system will communicate with upper computer by USB. Choose [RS485], the system will communicate with upper computer by RS485.
![[Calibration coefficient] upon measuring samples, there will be system errors due to connection to different systems. To](https://biolabscientific.com/content/manual/20260421002/Calibration-coefficient-upon-measuring-samples-i56-Biolab.webp "[Calibration coefficient] upon measuring samples")
Figure 50
![[Calibration coefficient] upon measuring samples, there will be system errors due to connection to different systems. To](https://biolabscientific.com/content/manual/20260421002/Calibration-coefficient-upon-measuring-samples-i57-Biolab.webp "[Calibration coefficient] upon measuring samples")
Figure 51
Help
Choosing [Help] in the original interface will display interface as shown in Fig.
![[Calibration coefficient] upon measuring samples, there will be system errors due to connection to different systems. To](https://biolabscientific.com/content/manual/20260421002/Calibration-coefficient-upon-measuring-samples-i58-Biolab.webp "[Calibration coefficient] upon measuring samples")
Figure 52
7. Sample test
7.1 Reagent preparation
( 1 ) Boric acid solution (20g/L): weigh and dissolve 20.00g boric acid in distilled
water, with volume defined in a 1,000mL measuring flask; shake it till evenly mixed. Add 100:1 mixture of methyl red and bromcresol green and make it uniformly mixed.
( 2 ) Sodium hydroxide solution (400g/L): weigh and dissolve 400.00g sodium
hydroxide in distilled water, with volume defined in a 1,000mL measuring flask; shake it till evenly mixed.
(3)Standard titration solution
a) Standard titration solution of sulfuric acid [c(1/2H2SO4)=0.1000 mol/L]: take and dilute 2.73mL concentrated sulfuric acid (density: 1.8419g/mL) with distilled water, with volume defined in a 1,000mL measuring flask; shake it till evenly mixed, and calibrate.
b) Standard titration solution of hydrochloric acid: take and dilute 8.30mL concentrated hydrochloric acid (concentration: 36%-38%) with distilled water, with volume defined in a 1,000mL measuring flask; shake it till evenly mixed, and calibrate.
( 4 ) Standard solution of ammonium sulfate: take and dissolve 6.6065g dried
ammonium sulfate (G/R) with distilled water, with volume defined in a 1,000mL measuring flask; shake it till evenly mixed.
( 5 ) Mixing 1 part of methyl red was dissolved in 0.l% ethanol solution of 95%
ethanol (1g / L) and 5 parts was dissolved in 0.l% bromocresol green ethanol solution of 95% ethanol (1g / L), please make it just before use.
Note: sulfuric acid (H2SO4), copper sulfate (CuSO4), potassium sulfate (K2SO4) shall be prepared for the digested sample.
Tips: Weigh 0.5-1g sample; add in 8mL-10mL concentrated sulfuric acid; and add in copper sulfate: 3.2g potassium sulfate of 1:15 mixture. (Refer to national standard and relevant industry standards for specific dosage)
When using Kjeldahl Analyzer, it is suggested as follows in order to reduce the measurement error of the device to the greatest extent:
(1) The pH of 2% boric acid absorption solution shall be regulated to 4.5;
(2) The reaction between strong acid and strong base is vigorous, thus it's suggested to dilute it by first adding 10-20 ml distilled water;
(3) The volume of 40% or approximate concentration of sodium hydroxide to be added is advantageously 4 times of that of concentrated sulfuric acid;
(4) Upon distillation, the total volume of liquid in the digestion tube is advantageously kept below 1/3 of the capacity of the digestion tube;
7.2 Reference value for test
The nitrogen content in the sample shall be considered in weighing sample. Where sample features high nitrogen content, fewer samples shall be taken provided the weighing error is reduced to the greatest extent. In case of low nitrogen content in sample, more samples shall be weighed. It can be generally advantageous that the weighed sample contains 15-50mg nitrogen.
Upon digestion of sample, add 10mL distilled water to dilute the digested sample. After it is fully cooled and leave it for measurement. Generally 0.1mol/L standard acid is taken as titration acid.
Relationship between standard titration acid to be chosen and nitrogen content in sample to be measured
7.3 Test parameter setup
Molar concentration of standard titration acid (mol/L) | Nitrogen content in sample to be measured (mg) |
0.02 | 0.1~20 |
0.1 | 15~100 |
0.15 | 30~200 |
Table 1
(1) Install the device, and properly connect the pipeline.
(2) Turn on the condensate water; place an empty digestion tube, start the device to vaporize water for 5-10 min in order to clean the pipeline and stabilize the steam flow.
(3) Put the digestion tube containing digested sample in place and close the security door. Set up corresponding parameters and functions to start the test. The device simultaneously starts the real-time test function. Add boric acid absorption solution, diluting water and concentrated alkali solution in the device. Ammonia gas emitted from distillation of steam is absorbed via condensate boric acid; and then standard acid is used for titration.
(4) After completion of the test, the result is displayed. Printing, automatic discharge and automatic cleaning are attainable. It returns to initial parameter input interface after completion of the test.
7.4 Device calibration
(1) Meaning of calibration coefficient K
Upon measuring sample by using the device, there will be system error due to connection to different systems. Thus, in order to make accurate measurement, a error calibration coefficient K shall be established. The users can carry out calibration by themselves.
The relationship between nitrogen content calculation and K value:

(2) Measurement of standard sample
Ammonium sulfate (purity level: at