Get Price
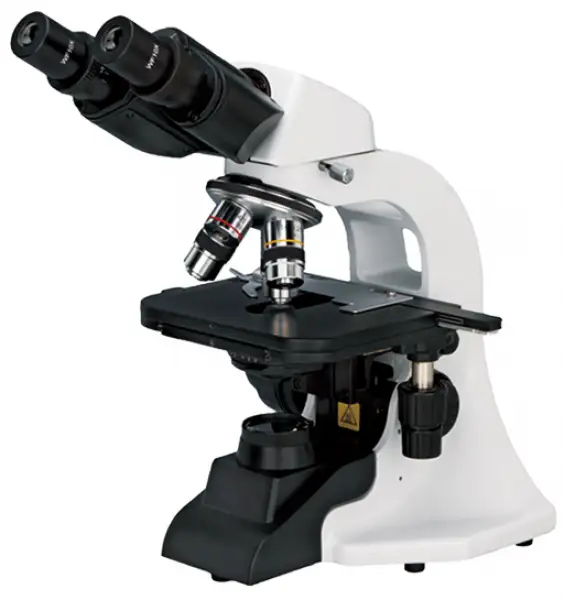
Biological Microscope BMIC-601
The Biological Microscope is a powerful scientific instrument for studying the microscopic world of biology. It offers high-resolution imaging, versatile observation modes, and precision controls, making it an indispensable tool for researchers, educators, and enthusiasts.
- Up to 3-Year Product Warranty
- US & EU Compliance Standards
- Door-to-Door Shipping
Technical Specifications
Detailed operating and construction parameters for this model.
| Model | BMIC-601 |
| Optical System | / |
| Viewing Head | Siedentopf binocular viewing head, inclined at 30°, |
| Eyepiece | WF10X/18 |
| Objective | Achromatic objective 4X,10X, 40X,100X |
| Nosepiece | Quadruple nosepiece |
| Focusing | Coaxial coarse&fine adjustment,fine division 0.002mm,coarse stroke37.7mm per rotation,fine stroke 0.2mm per rotation ,moving range 20mm |
| Stage | Double layers mechanical stage: 132*142mm, moving range: 75*40mm |
| Condenser | Abbe condenser NA1.25 with aperture diaphragm |
| Illumination | S-LED IIlumination, brightness adjustable |
| Power Supply | 110~220V, 50/60Hz |
| Accessories | Photo attachment, video attachment |
| Package Size | 323*264*440mm |
| Gross Weight | 6.5kg |
Operating Manual View instructions, operating procedures, safety information, and maintenance guidance.
Safety notice
1. Structure and nomenclature
2. Application
3.Technical parameter and specification
4. Configuration
5. Assemblage
6. Operation
7. Trouble Eliminating
8. Care and Maintenance
Safety notice
1. Transportation
As microscope is a precision instrument, handle with care, avoiding impact or abrupt movement during transportation. Do not push or pull the microscope during using, otherwise the precision for image will be reduced.
1_Hold the curve and keep the microscope in balance
2_Do not hold the focusing knob, eyepiece tubes and stage as these parts are movable. Troubles maybe caused by such handles.
Do not make specimen or filters fall off.

Figure 1
2. Working Environment
As microscope is a precision instrument, improper using will make it unworkable or reduce
its precision.
1_Do not expose the microscope in the sun directly
2_Temperature range is 0_-40_ and the max. humidity is 85%
3_Avoid high temperature and humidification otherwise there will be fog or mold on the lens
4_Avoid violent vibration as the vibration will reduce the image_s quality
5_Place microscope on a stable plane and keep it in balance. Keep the environment breezy
and cover the microscope with the dust-cover
6_Do not place microscope in moist room to avoid short circuit. Please turn off the power
supply as soon as water drop in the microscope. If there are other things unsafe come into
the microscope may cause short circuit too, please stop using and contact with manufacturers
3. Focusing knob
Never turn the left and right focusing knob in the adverse direction at the same time. Do not turn the coarse focusing knob when the stage reaches max.
position. These improper operations will make focusing structure unworkable.

Figure 2
4. Clamp
The clamps fix the microscope firmly during transportation. Please remove them before using.

Figure 3
5. Do not take the microscope apart
As it will be damaged. Such operations might have bad effect on the performance and make
user get an electric shock or injured. Please contact with manufacturers if there is any problem.
6. Make sure the voltage
There is correct input voltage in the label on microscope. Make sure the voltage in your position is right. Improper input voltage may cause short circuit and fire. The microscope will be damaged. Input voltage in the label: 100-240V 50/60Hz

Figure 4
7. Use the spare parts supplied by the manufactures
The bulb, fuse and electronic cord have been assembled already in the factory and please make sure to use the spare parts of them supplied by the manufacturers. Improper bulb, fuse and electronic cord will destroy microscope and cause fire. Please make sure to use PE electronic cord when using extra-long electronic cord. Spare bulbs: 3W LED lamp
Spare fuse: 250V 1A delayed model, 5 X 20 minitype fuse
8. Mounting the bulb
Never touch the surface of bulb with your hand directly. Please use gloves or cloth material when you mount the bulb to avoid leaving fingerprints. Fingerprints or stains should be wiped off with a tissue moistened with a small amount of alcohol. The fingerprints will etch on the bulb's surface and make brightness lower and life cycle shorter.
Please make sure the bulb's touching points are Ok as it will not light or short circuit if the bulb's touching points are damaged. Insert the bulb's legs into the bulb holder firmly. The bulb will go out if its legs have not been inserted into the holder firmly. Such Operation may cause short circuit or smoking. At last, please make sure if the collector has been mounted properly.
9. Temperature for illumination
When you use the halogen bulb, there will be high temperature when the bulb is lightened, never move the collector when the bulb is lightened. Do not touch the bulb within 30 minutes after it has been gout out. Make sure the bulb has been be cooling enough time (at least 30 minutes) to avoid scald. Do not put fibre, papers and incendive things (eg. Gasoline, aether, methanol and ethanol) close to the bulb.
10.Make sure to turn off the power supply before assembling microscope, replacing bulb or fuse.
11.Observing with oil immersion
Using small amount of oil immersion is enough. The redundant oil will adhere to stage or
condenser and these will reduce microscope's performance. Get rid of the redundant oil or clean the lens by using aether or pure alcohol according to this instruction. Pay attention during process as these things are incentive. The instruction you buy may not including some products mentioned in this instruction. Safety has been considered during design while users still have the possibility to be injured and the instruction to be damaged when improper operation made. Please pay much more attention to read this instruction carefully before using and keep it properly to make sure it will be got when it is necessary. 
13.Operating the microscope only indoor and under the adtitude 2000m, IP52 grads.
If the equipment is used in manner not specified by the manufacturer, the provided by the equipment may be impaired.
1. Structure and nomenclature

Figure 5

Figure 6
2. Application
BMIC-601 biological microscope is designed for clinical experiments and routine medical examination as well as for teaching and research purpose in biology, pharmaceutical, and bacteriology observation in medical and hygienic establishments, chemical laboratory, research institute and college, etc. This product, with modern design, good -looking appearance, adopts many advanced structure &technology in order that the clients can operate the instrument conveniently and safely. There and also following accessories can be optional for the customer: darkfield, phase contrast, photographic and video accessories.
3.Technical parameter and specification
1). Specification
1. Optical system:
Mechanical tube length: 160mm
2. Illumination: inserted transmitted illumination, 3W LED bulb(standard outfit)
Input voltage: 100V~240V 50/60Hz
Voltage undulation 10%
Rating 100V~240V 50/60Hz 0.8A
Fuse 250V 1A delayed model, 5X20 minitype fuse 2pcs
3. Focusing adjustment:
Division of fine focusing adjustment: 0.002mm
Fine focusing knob control range: stage will be up or down 0.2mm per circle
Coarse focusing knob control range: stage will be up or down 20mm
4. Mechanical stage
X-movement range: 54mm, Y-movement range: 78mm
5. Nosepiece:
Roller bear quadruple nosepiece
6. Condenser:
Abbe NA=1.25 with iris diaphragm
7. Eye tubes:
Interpupillary range 55~75mm
8. Working environment:
Temperature: 0~40°
Humidity: max. 85%, no dew
2) Optical parameter
1, Objectives: achromatic objectives
Magnification | N.A. | Cover glass thickness(mm) | W.D. (mm) | Dry/Oil |
4X | 0.1 | 0.17 | 26.9 | Dry |
10X | 0.25 | 0.17 | 6.4 | Dry |
40X | 0.65 | 0.17 | 0.6 | Dry |
100X | 1.25 | 0.17 | 0.098 | Oil |
Table 1
2, Eyepiece
WF10X/18mm
Nomenclature
1)Total magnification
Total magnification = Eyepiece's magnification Xobjective's magnification
2)Numerical aperture (N.A.)
N.A. value will affect resolution and image's brightness, it is the leading parameter for objectives. N.A.= n X sina
n stands for refractive index of the medium between objective and specimen or condenser (air or oil immersion)
a stands for half angle of max. aperture angle in the axis
The image will be sharper and brighter when the N.A. value is bigger
3)Resolution
Resolution can be measured by the distance value from one point to another one which could
be distinguished on the object surface
Resolution=λ /(2XN.A.)
λstands for wavelength ( λ= 0.55um)
4)Working distance
The distance between the object surface to the first surface of optical system when you get the sharpest image. The W.D. will become more short when the magnification for the objective is bigger.
5)Eyepiece view field
The max diameter measured when the diaphragm is open. 10X/18 means the magnification is10X and the max diameter of view field is 18mm
6)Effective view field
Liner view field which is observed on the object surface
Effective view field = eyepiece view field / objective's magnification
7)Depth of field
Depth of field stands for depth of the space in which there is sharp image on the object surface.
Depth of field will be longer when the diaphragm reduces. Depth of field will be shorter when the N.A. becomes bigger.
4. Configuration
Item | Content | Piece |
1 | Microscope_s body ( including stage, nosepiece, coaxial coarse and fine focusing adjustment,bracket for condenser, adjusting power 1pc supply,LED bulb and normal collector) | 1 set |
2 | Siedentopf Binocular | 1 pc |
3 | Condenser ( with iris diaphragm, without auxiliary lens) | 1 pc |
4 | Objectives(achromatic objectives)4X10X40X100X | 1 set |
5 | WF10X eyepiece | 2 pcs |
6 | Blue filter | 1 pc |
7 | Electronic cord | 1 pc |
8 | Immersion oil | 1 bottle |
9 | Dust cover | 1 pc |
10 | Instruction | 1 pc |
11 | Wrench 2.5, 1.5 | 1 set |
Table 2
Optional
Item | Content |
1 | Collector with iris diaphragm |
2 | Darkfield condenser |
3 | WF10X eyepiece with reticle |
4 | WF15X eyepiece |
5 | Plan objectives (4X, 10X, 40X, 100X) |
6 | 12V 20W halogen illumination |
7 | Trinocular head |
8 | 0.5X CCD camera adapter |
Table 3
5. Assemblage
Please read the safety notice carefully before assembly and make the assembly according to the following steps.
Tools: wrench (2 pcs)
1. Checking the input voltage
There is correct input voltage in the label on microscope. Make sure the voltage in your position is right. Improper input voltage may cause short circuit and fire. The microscope will be damaged. Turn off the power supply (turn the switch to O ) and insert one end of the electronic
cord (connector) into the entrance for AC. Insert the other end of the electronic cord (pin) into the grounded AC connector and make sure that the electronic cord has been connected safely
_ Please use the supplied electronic cord by manufacturer
_ Please make sure to use PE electronic cord when using extra-long electronic cord.
_ Pay attention that the microscope should be placed near AC connector and the AC connector is touchable for users

Figure 7
2. Removing the clamps for transportation
The clamps fix the stage and focusing adjustment firmly during transportation.
Handle the grooves beside collector and pull it out. Remove the clamps by wrenches.
_ Mechanical stage
There is one clamp fixing the mechanical stage in
Y axis direction. Remove the bolts and clamps.
_ Focusing adjustment
Pull out the collector. The bracket is fixed by one clamp. Please remove the bolts and clamps.

Figure 8
3. Mount the binocular head
Loosen the fixing screw in the eye tubes and insert the binocular head into the eye tubes. Then tighten the screw.

Figure 9
4. Mount the blue filter
Take out the filter from the bottom of condenser and mount it in the bracket then move the bracket into the condenser.

Figure 10
5. Adjustment and replacement
1_Condenser
The condenser is mounted in the microscope before shipment. Remove or replace the condenser according to the following steps
a. Handle the grooves of the condenser and pull it out
b. Turn the lifting knob for condenser and make the bracket in a suitable position
c. Loosen the screw in the left side of condenser and take out the condenser. Mount the blue filter in the bracket then move it into the bottom of the condenser. Make the label in the condenser forward and move the condenser into the bracket. At last tighten the screw.
d. Handle the grooves and push the condenser in.
e. Turn the lifting knob of condenser and make the condenser to the highest position.
f. Turn the lifting knob of condenser and make the condenser a lit bit lower. The image will be focused in the right place of object (center of light path) when the light transit condenser. Move the condenser up and down a little to make the dispersion image disappeared.

Figure 11
2_Objectives
The objectives have been mounted in the microscope before shipment
Take off the specimen from the stage and make the stage lower when you replace the objectives. Handle the objective with your two hands and remove it. Be carefully do not make it fall off. Turn the nosepiece to get the objiective you need. The magnification for the objectives become bigger in clockwise direction (observing from the top of the microscope).
3_Specimen clip
The clip has been mounted in the stage before shipment
Loosen two screws by wrenches supplied by manufacturer to remove the clip.
4_Eyepieces
10X eyepieces have been in the foam box before shipment. Insert the eyepiece into the eyepiece tubes and tighten the fixing screws by wrench
5_Other attachments
Replace other attachments (eg, camera) according to the instruction
6. Replacement
1_Replacement for bulb (halogen bulb, optional)
Turn off the power supply (turn the switch to _O_)and pull out the connector
Wait for 30 minutes till the bulb is cooling
Handle the grooves in condenser and pull it out
Pull out the original bulb
Replace the bulb by gloves or cloth material then insert the bulb into the socket entirely
Pull the condenser back to its original position
Connect the electronic cord to the power supply
2_Replacement for fuse
Turn off the power supply (turn the switch to O)and pull out the connector
Open the cover for fuse by screwdriver
Mount the new fuse
Make sure that the voltage shown in the cover for fuse is same to the working voltage
Mount the cover
6. Operation
1. Illumination
Turn on the power supply (turn the switch to -) ,then the bulb will be on. The lightness can be adjusted by turning the adjusting knob.
2. Interpupillary range
Adjust the sediment of binocular to make sure that view field in the right and left eyepiece is consistent.
3. Placing the specimen
Put the specimen in the stage and make the cover glass on it. Make the clips clamp them entirely. Two slides can be put in the stage in the same time
4. Focus by 10X objective
Put the 10X objective into the optic path and focus by turning coarse and fine focusing knob
_ Turn the stage and focusing knob according to the direction shown in the picture
_ There is no coarse focusing knob in one side of stage_s moving knob and in the other side
there are both coarse and fine focusing knob
_ Never turn the left and right focusing knob in the adverse direction at the same time. Never
turn the coarse focusing knob when the stage is in the end of removing range. Otherwise it will make damage to the instrument
_ Detailed operation
It is difficult to do focusing if turning the focusing knob optionally. The specimen may be crushed when 100X objective is used. Please read the instruction carefully to avoid making damage to the cover glass or objective
1_Put the 10X or 4X objective into optic path
2_Remove the stage to the top by turning the coarse focusing knob
3_Observe through the eyepiece and turn the coarse focusing knob slowly to let the stage down and down till there is sharp image
4_Turn the fine focusing knob to focus finely Use the 10X objective or 4X objective firstly before 40X and 100X objective. Turn the fine focusing knob to focus finely
5. Adjusting the diopter for eyepieces
Adjust the diopter ring according to user's diopter for left and right eyes. This function could make use of advantages of objectives fully. Meanwhile it also can be react as focusing
1_Put the 40X objective in the optic path and turn the coarse and fine focusing knob to do focusing
2_Put the 10X objective (or 4X objective) in the optic path
3_Let your left eye observe through the left eyepiece and do focusing by the diopter adjusting ring in left eyepiece
4_Repeat the above steps till sharp image can be observed by left and right eyepiece at the same time.
6. Adjusting the upright position for condenser
Turn the lifting knob for condenser till it reaches the top position then fall it a little bit down. If there is dispersion image in the view field, please remove the condenser a little bit of up and down to make the dispersion image disappeared
7. Objectives
Turn the nosepiece to choose the objective and adjust the view field diaphragm and aperture accordingly
8. View field diaphragm
Adjust the view field diaphragm according to the objective till it_ image touches the edge of view field as this could eliminate the outside light and increase the contrast of the image.
Notice: There will no image for view field diaphragm when 100X objective is used. So adjust the diaphragm to it's min diameter
Centering view field diaphragm
1_Use the 10X objective and focus the image. Turn the view field diaphragm adjusting ring with ershins and reduce the diaphragm's diameter
__Turn the lifting knob for condenser to focus the image of view field diaphragm
__Turn the two centering screws for condenser and make the image in the center of view field
__Check the centering and open the view field diaphragm till the image of the diaphragm touches the edge of view field. Please do the centering again if the image of the diaphragm doesn_t touch the edge of view field
__Open the view field diaphragm and make its image a little bigger than the view field in practice
9. Adjusting aperture diaphragm
Adjust the aperture diaphragm adjusting shaft for condenser till the position which stands for the magnification of objective
_ adjusting the aperture diaphragm
1_Adjust the aperture diaphragm by the adjusting shaft. The brightness and resolution will be decrease while the contrast and depth of view will increase if the diameter of aperture diaphragm reduces
2_Adjust the value of aperture diaphragm to 70%-80% of the value of objective_s N.A.
3_The aperture diaphragm could control the N.A. of condenser. Do not adjusting the brightness by it while use the brightness adjusting knob to make the adjustment
4_N.A. is marked in each objective
e.g. 40X/0.65 stands for that magnification is 40X and N.A. is 0.65
5_Remove the eyepiece and observe through the eye tubes by eyes directly N.A. of condenser could tell users the position of aperture diaphragm adjusting shaft in corresponding magnification. (That is to say, the value of aperture diaphragm should be 70% to 80% of the N.A. of objective when the aperture diaphragm adjusting shaft reaches some position) If the objective has been changed, please move the shaft to the position with the same value which is in the objective in the optic path and this will make ideal contrast
10. Observing with oil immersion
There is_ oil_ marked in the oil immersion objective. Please use the oil immersion supplied by the manufacturer between the objective and cover glass.
1_Operation
Condenser_
Remove the slide back and fall the condenser down a little.
One drop of oil could be placed in the top of condenser by through the long aperture of stage.
Then move the slide forward and lift the condenser up
Objectives_
Turn the nosepiece and take the objective out of the optic path. Place one drop of oil on the slide then turn the condenser slowly and mount the objective.
2_Air bubble in oil immersion
a) Never make the oil immersion into your eyes. Please take following steps as soon as the oil immersion touches your skin or eyes.
Use soap or clean water to wash your skin carefully.
Please wash your eyes with clean water (at least wash 15 minutes) and go to the hospital at once.
b) Do not expose the oil immersion in the sun or ultraviolet radiation directly.
As the air bubble in the oil immersion will make bad affect to the quality of image, please make sure that there is no air bubble in the oil immersion before use. Please check the air bubble as following, remove the eyepieces and open the view field diaphragm and aperture diaphragm entirely then observe the exit pupil which is light and in nummular shape.
c) Remove the air bubble as following.
Turn the nosepiece slowly and turn the oil immersion objective once or twice.
Turn the lifting knob for condenser slowly and make the condenser a little bit of up and down.
Increase the amount of oil immersion or change the old oil immersion with new one
3_Operation for oil immersion
Use the oil immersion as little as possible. The oil immersion will be conglutinated to the stage and condenser and this will have bad effect the performance if there is too much oil immersion. Please clean the redundant oil on the objective and condenser after finishing the observation otherwise the image will be affected. Use the aether to clean the oil then use the pure alcohol (ethanol or carbinol) to make entirely cleaning. Please repeat the clean three or four times.
_ Notice:
Please follow the instruction from manufactures when the aether or pure alcohol is used.
Keep them away from the fire or electronic spark
4_Attention
_ Keep the bottle for oil immersion sealed as much as possible and check it periodically
_ Never press the bottle overly as it may caused oil gushed out of the bottle
_ Clean the out surface of the bottle from remanent oil
11.Adjusting the coarse focusing knob's tension
The tension of coarse focusing knob is adjustable. Please turn the tension controlling ring of the coarse focusing knob clockwise then the tension will be increased. This ring is near the coarse focusing knob. If you want decrease the tension, please turn the ring with ershins. The stage will fall down automatically if the tension of the ring decreased too much.
7. Trouble Eliminating
If difficulties should be encountered in the course of operation, and no major instrument mal functions can initially be detected, please recheck the symptoms, referring to the tables provided below, before contacting the service department representative.
1. Optical


8. Care and Maintenance
1. Cleaning Lenses
Dust is best removed with a soft brush or gauze.
More persistent dirt, such as fingerprints, grease and oil, may be removed with soft cotton, lens tissue, or gauze lightly moistened with absolute alcohol (ethyl or methy alcohol).
To clean immersion oil off the oil-immersion type objective, use lens tissue, soft cotton or gauze lightly moistened with petroleum benzine only.
Do not use petroleum benzine to clean the entrance lens at the bottom of the eyepiece tube or prism surfaces inside the eyepiece tube.
Absolute alcohol and petroleum benzine are quite inflammable. Take great care when handing them and when setting the power switch on and off. Be very careful with fire.
2. Cleaning painted or plastic surfaces
Avoid use of and organic solvents (such as alcohol, ether, thinner, ect.) to clean the painted or plastic surfaces of the instrument. We recommend the use of silicon cloth.
More persistent dirt may be cleaned with mild detergent solution.
Printed plastic surfaces should be cleaned only by soft cloth moistened with water.
3. When not in use
When the microscope is not in use, cover it up with dust cover, and store in a dry place not subject to mold.
We especially recommend that the objectives and eyepieces be kept in a container( such as a desecrator).
4. Periodical inspection
To maintain the performance of the microscope, periodical inspection is recommended.