Get Quote ▼
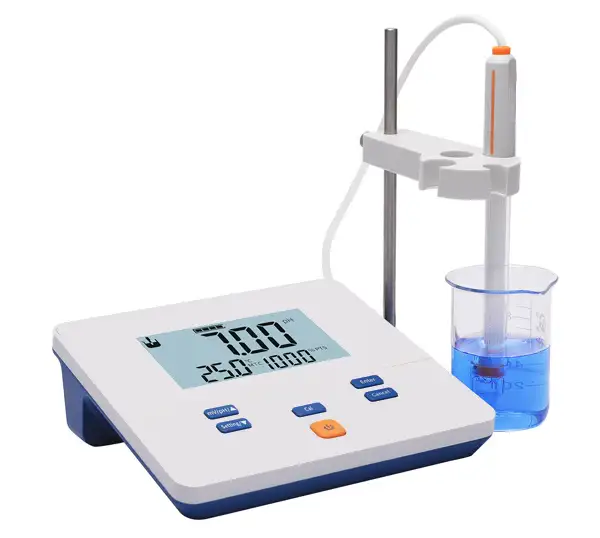
pH Meter BMET-201
 Get Quote
Specifications
| Model | BMET-201 |
| pH | |
| - Range | -2.00 to 14.00 pH |
| - Resolution | 0.01 pH |
| - Accuracy | ± 0.01 pH |
| - Calibration Points | Up to 2 |
| - Standard Recognition | NIST buffers |
| mV | |
| - Range | -1800 to 1800 mV |
| - Resolution | 1 mV |
| - Accuracy | ± 0.1 %FS |
| Conductivity | |
| - Range | / |
| - Resolution | / |
| - Accuracy | / |
| - Reference Temperature | / |
| Measurement | |
| - Reading Mode | Continuous |
| - Reading Prompts | Reading, Stable |
| - Temp. Compensation | MTC |
| Inputs | |
| - pH Electrode | BNC(Q9) |
| - Conductivity Probe | / |
| Display Options | |
| - Backlight | Yes |
| - Auto Shutdown | 300, 600, 1200, 1800, 3600 sec., off |
| - IP Rating | IP54 |
| General | |
| - Power | AC Adapter, 100-240 V AC input, DC 9V output |
| - Dimensions | 200x160x63 mm |
| - Weight | 600 g (1.32 lb) |
Operating Manuals
 Download Manual (PDF)
1 Introduction
1.1 Introduction
1.2 Technical Specification
1.3 Function Introduction
2 Safety Notices
3 Terms Explanation
4 Overview and Installation
4.1 Overview
4.2 Instrument installation
5 Instrument Operation
5.1 Screen Icons
5.2 Key Functions
5.3 Instrument Settings
5.4 Calibration
5.5 Measurement
6 Maintenance and Troubleshooting
6.1 Maintenance
6.2 Electrode usage and maintenance
6.3 Troubleshooting
7 Technical Support
8 Appendix
1 Introduction
1.1 Introduction
BMET-201 pH meter can be widely used in universities, environmental protection, medicine, food, health, geological prospecting, metallurgy, marine exploration and other fields, common acid rain detection, industrial wastewater, surface water, drinking Water, beverages, daily chemical products, textiles, etc. All these fields require pH and electrode potential (mV) value measurement.
General Features
LCD display screen, 6.0 inches.
pH, mV value measurement.
The instrument displays electrode slope and data stability mark.
Support electrode calibration function, up to 2-point calibration.
Automatic calibration function, automatic identification of three pH standard buffer solutions: 4.01pH, 7.00pH and 10.01pH.
Automatic calibration function.
Support manual calibration function, custom standard solution.
Manual temperature compensation.
IP54 protection.
1.2 Technical Specification
Table 1-1 Instrument specifications
Model | BMET-201 | |
pH level | 0.02 pH | |
mV | Range | (-1800~1800)mV |
Minimum resolution | 1mV | |
Electronic unit indication error | ±0.1%(FS) | |
Electronic unit repeatability | 1mV | |
Electronic unit input current | ≤1x10-12A | |
Electronic unit input impedance | ≥1x10¹²Ω | |
pH | Range | (0.00~14.00)pH |
Minimum resolution | 0.01pH | |
Electronic unit indication error | ±0.01pH | |
Electronic unit repeatability | 0.005pH | |
Instrument indication error | ±0.02pH | |
Instrument repeatability | 0.01pH | |
Temperature | Range | Manual (0.0~60.0)°C |
Use environment | Ambient temperature: (0~40) °C Relative humidity: not more than 85% | |
Dimensions(LxBxH), Weight(kg) | 200mmx160mmx63mm, About 0.6kg | |
Power supply | AC Adapter,100-240V AC input, DC9V output | |
1.3 Function Introduction
Table 1-2 Main functions
Function | Explanation | |
Basic function | Backlight Power | • |
Reset settings | • | |
Power failure protection | • | |
Automatic shutdown | • | |
Protection | IP54 | |
Reading function | Reading Mode | continuous-read |
pH/mV | PH electrode status/performance display | •Slope |
Multi-point calibration | 2 | |
Automatic identification of standard solutions | 1 group standard solution | |
Custom standard solution | Manual identification of standard solutions | |
Manual temperature compensation | (0.0~60.0)°C | |
Temperature | Temperature unit | °C |
• Equipped
2 Safety Notices
Please read the entire contents of this manual carefully before use, and please keep this manual properly. The user MUST use the instrument following this manual to avoid damage to the user and equipment.
Before using the meter, READ the following notes:
DO NOT disassemble the device for inspection or repair.
To prevent electric shock or damage to the device, do not place cables and connectors in any liquid, wet or corrosive environment.
Please use the defaulted power adapter
Do not use it if the power cord is damaged (the wire is exposed or broken).
Do not use in flammable and explosive environments.
Do not use if the user finds any abnormalities such as damage or deformation of the device.
The following identifiers will be used in this manual.

3 Terms Explanation
pH Slope: The amount of potential change generated by each 1 pH change, expressed in mV/pH or by 100% Theoretical Slope (PTS). pH = - log[H], where [H] means molar concentration (mol/L) of H ions.
E0 of pH: Also known as "zero potential", usually refers to the potential value at pH 7.
One-point calibration: Calibration with a standard solution.
Two-point calibration: Calibration with two standard solutions.
Multi-point calibration: Calibration with more than two standard solutions.
4 Overview and Installation
4.1 Overview

Figure 4-1 Overview-Front View


Figure 4-2 Overview- Back View


Figure 4-3 Electrodes and connectors

4.2 Instrument installation
4.2.1 Multifunctional electrode holder mounting
1) Screw the screw of the electrode stem into the screw hole of the plug-in board.
2) Put the rear round hole of the electrode fixing clip into the electrode stem, adjust the height and tighten the set screw.

Figure 4-4 Installation of the multifunctional electrode holder
4.2.2 Electrode installation
Install the electrode on the electrode holder, find the measuring electrode connector on the back of the meter, and insert the electrode plug into the connector.
5 Instrument Operation
5.1 Screen Icons
The meter uses segment LCD as the display, and the overall design is as follows: The upper shows the status prompt area; the middle is the measurement result area; the lower right corner is the current percent slope, and the left is the main function area, including measurement function, calibration function, and setting function.

Fig. 5-1 Screen icons explanation
No. | Symbol | Explanation | Note |
1 |
| Reading state | All four segments are lit up in stable state |
2 |
| Automatic shutdown | Flash display when automatic shutdown is enabled |
3 | mV | mV result unit | Unit: mV |
4 | pH | pH result unit | Unit: pH |
5 | Sec | Time unit | Unit: Sec |
6 | °C | Temperature | Unit: °C |
No. | Symbol | Explanation | Note |
7 | MTC | Manual temperature compensation | Represented by character string MTC |


8 | %PTS | Percentage slope value | Represented by character string %PTS |
9 |
| Measurement | |
10 |
| Calibration | |
11 |
| Setting |


Table 5-1 Symbol Explanation
5.2 Key Functions

Fig. 5-2 The Screen and the Key
Table5-2 Key Function Explanation
No. | Key | Explanation | Note |
1 |
| Power | Press to switch on the instrument. Press and hold for more than 3 seconds to switch off. Can be used as a backlight power key after switching on. |
2 |
| Mode | Switch mV and pH display in measurement state. The value increases when the function is set. |
3 |
| Setting | Enter the setting function. Decrease the value when setting the function. |
4 |
| Cal | Enter the calibration function during measurement. |
5 |
| Enter | Confirm some function. |
6 |
| Cancel | Give up some function. |


5.3 Instrument Settings
5.3.1 Switch On/Off
press  to start. The meter performs self-test, and then enters the measurement state. After use, the user can press and hold the key for more than 3 seconds to switch off.
Table 5-3 Characters displayed on the power operation interface
No. | Character display | Explanation |
1 | U2F | Switch On, Software Version |
2 | OFF | Switch Off |

5.3.2 Instrument Settings
The meter supports a variety of functions, including setting the manual temperature value, setting the automatic switch-off time, factory reset, etc. The user presses the "Setting/▼" key, the meter will display the setting logo, SEL and serial number, the user presses up and down key to adjust, press the enter key to select.

Fig. 5-3 Setting function display
Table 5-4 Set function list in the measurement status
No. | Explanation | Note |
1 | Temperature Settings | Flashing display °C |
2 | Automatic shutdown settings | Flashing display "APD"(Auto Power Down) |
3 | Reset settings | Flashing display "rSt" (Reset)and "dFt" (Default) |
5.3.2.1 Temperature Settings
The meter doesn't support the connection of temperature electrodes, the user needs to use a thermometer to measure the temperature of the solution. Press the "Setting/▼" key to select the temperature setting function, press the "Enter" key, and adjust the temperature to the specified temperature value by up and down key.

Figure 5-4 Setting temperature value display
5.3.2.2 Automatic shutdown settings
The meter provides auto shutdown function. When the meter is not using and set the auto shutdown, the meter switches off automatically. There are six options: off, 300Sec, 600Sec, 1200Sec, 1800Sec, and 3600Sec.
5.3.2.3 Reset settings
When the meter is not working. Users can reset the meter from the defaults backup. The default setting includes the electrode slope as 100%, the temperature as 25.0°C, continuous reading mode, automatic shutdown as close etc.
5.4 Calibration
5.4.1 Prepare electrodes
Before using the pH electrode, please pay attention to the following items:
Pull out the electrode protection cap at the bottom end of the pH electrode, and pull down the rubber sleeve at the upper end of the electrode to expose the small hole at the upper end.
Clean the electrodes with distilled water.
For details on the use, storage of the pH electrode, please refer to the electrode instruction manual.
5.4.2 pH electrode Calibration
The pH electrode has a certain drift in different use environments or when it has not been used for a long time, resulting in different electrode slopes and zero points. It needs to be re-calibrated with a standard buffer solution.
If the user needs to perform two-point calibration, two standard solutions must be prepared in advance. If only one-point calibration is required, only one standard buffer solution is required.
One-point calibration is suitable for the situation where the measurement accuracy is not high. At this time, the percentage slope of the electrode is taken as 100%. Usually, two-point calibration or multi-point calibration is used to improve the measurement accuracy of pH.
Generally, when the meter is used continuously, it is recommended to calibrate once a day.
The meter supports automatic identification of standard buffer solutions,and can identify three standard solutions of 4.01pH, 7.00pH, and 10.01pH. Users can refer to the appendix to prepare pH standard buffer solution, or purchase market standard buffer solutions.
Prepare 1-2 standard buffers and deionized water as required to start calibration. The calibration steps are as follows (for reference):
Prepare 1~2 standard pH buffers as required.
In the measurement state, press the "Cal" key to enter the electrode calibration state (the default is automatic identification mode, the word "Auto" is displayed).
Wash the pH electrode repeatedly with distilled water, put it in a certain standard buffer solution (such as 7.00pH standard buffer solution), the instrument displays pH value and temperature value (such as 7.00pH, 25.0°C).
Use a thermometer to measure the temperature value of the standard solution, press the "Setting/▼" key and manually input the current temperature value (such as 25.2°C), and press the "Enter" key to complete the temperature value input.
Wait for the reading to stabilize, press the "Enter" key, and the meter stores the calibration data and displays the calibration result, that is, the nominal pH value at 25.2°C.

Figure 5-5 Calibration display
When performing multi-point calibration, repeat the process above, after cleaning the electrode, put it in other standard solutions, and then repeat the measurement of temperature and set the temperature value, and confirm after the data is stable. The meter supports up to 2-point calibration. When the user finishes calibrating 2 standard solutions, the meter will automatically end the calibration and return to the measurement state. If the user only needs to calibrate 1 point, you can manually press the "Cancel" key to terminate the calibration.
If the user uses a non-standard pH buffer solution to calibrate the electrode, the user must know the relationship between the pH value of the non-standard solution, that is, the nominal pH at a certain temperature, and then control the temperature of the constant temperature tank to make the standard solution reach specified temperature value.
Calibration steps are as follows (for reference):
Place the standard solution in a constant temperature tank, in which the temperature is controlled to a certain temperature value.
Press and hold the "Cal" key to switch the identification mode to manual identification (the word "Non" is displayed), and press the up and down key to set the nominal pH value at the current temperature.
Press the up and down key to set the nominal pH value at the current temperature.
Press the "Setting/▼" key and manually input the current temperature value, and press the "Enter" key to complete the temperature value input.
After the data is stable, press the "Enter" key to complete the calibration.
Table 5-5 Characters displayed on the calibration operation interface
No. | Character display | Explanation |
1 | Auto | Display when the standard solution is automatically identified, indicating Auto Recognition. |
2 | Non | Display when the standard solution is manually identified, indicating Manual Recognition. |
3 | Err | Display when calibration fails, indicating Error. |
4 | OH | Display when the confirmation is valid during calibration, indicating OK. |
5 | End | Display when calibration is completed. |

5.5 Measurement
5.5.1Measurement preparation
Before measurement, the user should understand the properties and attributes of the substance (sample) to be measured; the method of routine testing; know the basic operation and application of the meter; know the use and maintenance of conventional electrodes.
The user needs to prepare the sample first, or the standard solution that needs to re-calibrate the electrode, etc.
5.5.2 Measurement
After pH electrode calibration, pH value and potential value of the solution can be normally measured.
The measurement steps are as follows (for reference):
Immerse the electrode in the solution to be measured.
Use a thermometer to measure the temperature value of the current solution, and then manually set the temperature value.
Wait for the data to stabilize, and then read the measurement results.
In the measurement state, press the mode key "mV/pH/▲" to switch the mV value or pH value display.


Figure 5-6 Measurement display

6 Maintenance and Troubleshooting
6.1 Maintenance
The correct use and maintenance of the meter can ensure the normal and reliable operation of the meter, especially the pH meter, which has a high input impedance and is easily damaged by static electricity and other electromagnetic interference. In addition, it will often come into contact with chemicals, and the use environment is relatively harsh, so reasonable maintenance is required:
The measuring electrode socket of the meter must be kept dry and clean.
After the electrode is disconnected, please connect the short-circuit plug to the socket to prevent high resistance damage.
When calibrating the electrode with pH standard buffer solution, ensure the reliability of the buffer solution, otherwise it will affect the accuracy of the measurement results.
6.2 Electrode usage and maintenance
Before using the electrode, you should read the electrode manual carefully to know the type, structure and application scope of the electrode. For composite pH electrodes with plastic shells, the following points should generally be noted:
The external reference supplement of the composite electrode is 3mol/L potassium chloride solution. The supplement can be added from the small hole at the top of the electrode. When the composite electrode is not in use, the rubber cover should be pulled to prevent the supplement from drying up.
After removing the electrode protection cap, the sensitive glass bubble of the electrode should be avoided from contacting with hard objects. Any damage or scratching will make the electrode ineffective.
After the measurement, the electrode protection cap should be covered in time. A small amount of external reference supplement should be placed in the protection cap to keep the electrode bulb moist. Do not immerse the electrode in distilled water for a long time.
The Q9 short-circuit plug of the electrode should be kept clean and dry to prevent short-circuit by rust, otherwise it will cause measurement inaccuracy or failure.
Electrodes should avoid long-term immersion in protein solutions and acidic fluoride solutions, and should avoid contact with silicone oil.
Due to the different electrode materials, please select the appropriate electrode according to the actual use to avoid damage to the electrode.
Repair pH Electrodes: After long-term use of the electrode, if the slope decreases slightly, the bottom end of the electrode can be immersed in 4% HF (hydrofluoric acid) for (3-5) s, wash with distilled water, and then soak in 0.1 mol/L hydrochloric acid solution to rejuvenate.
Clean pH Electrode: If the measured solution contains substances that are easy to contaminate the sensitive bulb or block the liquid junction and make the electrode passivated, the slope will decrease and the display reading will be inaccurate. If this phenomenon occurs, according to the nature of the contaminant, the electrode should be cleaned with an appropriate solution to regenerate the electrode.
Table 6-1 Reference table of electrode contaminants and cleaning agents
Contaminant | Detergent |
Inorganic metal oxide | Less than 1 mole /L of dilute acid |
Organic fatty substances | Dilute detergent (weak alkaline) |
Resin polymer material | Alcohol, acetone, ether |
Protein hemocyte precipitate | 5% pepsin +0.1mol/L HCl solution |
Pigment substance | Dilute bleach solution, hydrogen peroxide |
For more details, see pH electrode instructions
6.3 Troubleshooting
Table 6-2 Common Troubleshooting
Phenomenon | Probable reasons | Solutions |
1.No Display | Not turn on. Instrument damage. Damaged power adapter. | Connect the charger, wait a moment and press the power key to turn it on. Replace or repair as specified. Replace the power adapter. |
2.Inaccurate measurements | Poor electrode performance. Electrode calibration error. | Replace electrodes. Recalibrate the electrode. |
If the meter still cannot work normally after all above are eliminated, please contact our company.
7 Technical Support
Accessories
Please refer to the accessories table for purchasing recommendations.
Table 7-1 Meter accessories
Name | Description |
E-201F pH composite electrode | Conventional sample measurement |
pH standard buffer reagent | pH4.01, 7.00, 10.01 |
Power Adapter | Input: AC 100~240V, Output:DC 9 V |
Table 7-2 Optional electrodes
Model Name | Electrode plug | Description |
E-201-Z pH composite electrode (Blade spear) | BNC(Q9) | Suitable for special samples such as semi-solid samples, etc. |
E-201-P pH Composite Electrode (Flat) | BNC(Q9) | Suitable for flat sample measurement |
65-1C pH composite electrode (Glass shell) | BNC(Q9) | Glass shell, resistant to organic corrosion |
962103 pH composite electrode (Low maintenance) | BNC(Q9) | Suitable for conventional aqueous solution and general contamination samples |
962221 pH Composite Electrode (Ultrapure Water ) | S7-BNC(Q9) | Suitable for ultra-low conductivity water samples such as pure water and deionized water |
962121 pH composite electrode (Low conductivity ) | S7-BNC(Q9) | Suitable for low conductivity samples with conductivity above 100us/cm |
Model Name | Electrode plug | Description |
962241 pH Combination Electrode (Blade spear) | BNC(Q9) | Suitable for solid and semi-solid piercing samples |
962242 pH Composite Electrode (Flat ) | S7-BNC(Q9) | Suitable for surface or droplet samples |
962244 pH composite electrode (Slender) | S7-BNC(Q9) | Suitable for trace samples above 0.2mL, or narrow-bore containers |
962243 pH composite electrode (Long) | S7-BNC(Q9) | Suitable for large volume container samples |
962102 pH composite electrode (Cleanable) | BNC(Q9) | Suitable for highly polluting samples such as emulsions, suspensions, and viscous |
962223 pH composite electrode (RoHS) | S7-BNC(Q9) | RoHS Compliant |
962224 pH composite electrode (High temp. resistance) | S7-BNC(Q9) | Suitable for high temperature samples |
8 Appendix
Appendix 1
Temperature(°C) | 1.68 | 4.01 | 7.00 | 10.01 |
5 | 1.67 | 4.00 | 7.09 | 10.25 |
10 | 1.67 | 4.00 | 7.06 | 10.18 |
15 | 1.67 | 4.00 | 7.04 | 10.12 |
20 | 1.68 | 4.00 | 7.02 | 10.06 |
25 | 1.68 | 4.01 | 7.00 | 10.01 |
30 | 1.68 | 4.01 | 6.99 | 9.97 |
35 | 1.69 | 4.02 | 6.98 | 9.93 |
40 | 1.69 | 4.03 | 6.97 | 9.89 |
45 | 1.7 | 4.04 | 6.97 | 9.86 |
50 | 1.71 | 4.06 | 6.97 | 9.83 |
pH-Temperature Relationship Table of pH Standard Solutions