Get Price
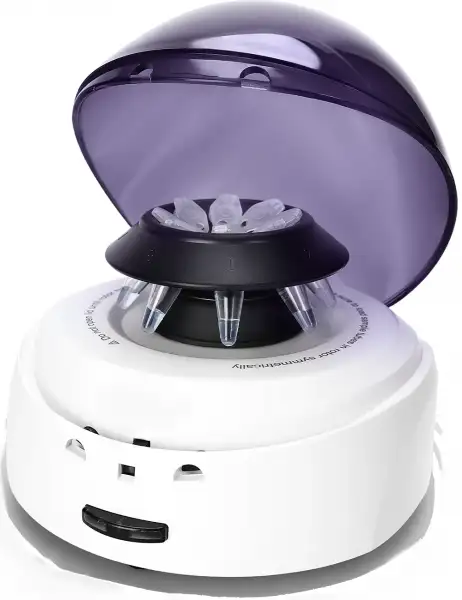
Micro Centrifuge BCMI-401
- Easy to operate with dual start/stop function - Close lid for a spin speed up to 7000 rpm
- Smooth and quiet operation (noise level ≤45 dB)
- Accelerates and brakes in seconds
- Safe, endurable and robust rotor with clamp locking design
- Compatible with 2 mLx8 and PCR 8x4 rotors
- Quick-change rotor without any tool
- Up to 3-Year Product Warranty
- US & EU Compliance Standards
- Door-to-Door Shipping
Technical Specifications
Detailed operating and construction parameters for this model.
| Model | BCMI-401 |
| Max. Speed | 7000rpm |
| Max. RCF | 2680xg |
| Rotor Capacity | 0.2/0.5/1.5/2mL x 80.2mL x 32 PCR tubes0.2mL x 4 PCR8-strips |
| Run Time | Continuous operation |
| Driving Motor | DC motor |
| Power Requirements | AC100-240V/50Hz/60Hz20W |
| Noise Level | ≤45dB |
| Dimension [DxWxH] | 160x170x122mm |
| Weight | 0.5kg |
Product Features
Key design, performance, usability, and safety advantages.
Applications Explore common laboratory, research, industrial, and process applications.
This centrifuge is ideal for quick spins, microfiltration of samples, cell separations and many other routine laboratory procedures.
Accessories For Purchase View compatible optional accessories and additional items available separately.
| Images | Name | Description |
 | Rotors | Max. speed: 7000 rpm Max. RCF: 2680 x g Rotor capacity: 0.2 mL x 32 PCR tubes 0.2 mL x 4 PCR 8-strips Rotor material: High strength plastic |
 | Rotors | Max. speed: 7000 rpm Max. RCF: 2680 x g Rotor capacity: 2 mL / 1.5 mL x 8 0.2 mL x 8 0.5 mL x 8 Rotor material: High strength plastic |
 | Adapters | 0.2 mL rotor adapter Used with A8-2P rotor 8 pcs/pk |
 | Adapters | 0.5 mL rotor adapter Used with A8-2P rotor 8 pcs/pk |
Operating Manual View instructions, operating procedures, safety information, and maintenance guidance.
1. Installation Instructions
2. Rotor installation
3. Rotor installation


A08-2P A04-PCR8 SA02P2 SA05P2
1. Installation Instructions
1. Unpack and place the centrifuge on a solid and flat surface (Laboratory bench space).
2. Ensure good working environment and ambient temperature of 15°C-25°C.
3. Protect the centrifuge from direct sunlight or temperature of higher than 30°C.
4. Place the unit at > 10cm distance from other objects to allow good ventilation& performance.
5. Please keep the centrifuge away from heat or water (liquid) and chemicals.
2. Rotor installation
1. Ensure the centrifuge chamber is clean and dry.
2. Ensure there is no sign of corrosion or crack or damage on the rotor.
3. Place the rotor in position on the rotor base or motor shaft.
4. Press the rotor inward on the motor shaft to secure tightly.
5. Please use your both hands to load the rotor.

Figure 5

Figure 6
3. Rotor installation
1. Switch power ON located at the back of the unit.
2. Open the lid and load the centrifuge tubes symmetrically on to the rotor.
3. Close the centrifuge lid to start centrifugation process.
4. Switch power 'OFF' or open the lid and the rotor will stop gradually.
5. Open the lid and collect the samples.
Note: The production date and service life information can be referred to the following content
Production date: See machine nameplate Life and warranty
1) Under normal circumstances, the whole machine life is five years.
2) Centrifuge provides 1 year warranty from the manufacturer's delivery date.
Note: The following conditions are not covered by the warranty
1) Incorrect installation damage
2) Incorrect operation damage
3) Damage caused by handling or transportation
4) Damage caused by unauthorized disassembly
5) Damage caused by using non-original parts
6) Damage caused by irresistible natural causes such as earthquake and fire
7) Accessories and consumables exceed the warranty period.