Get Price
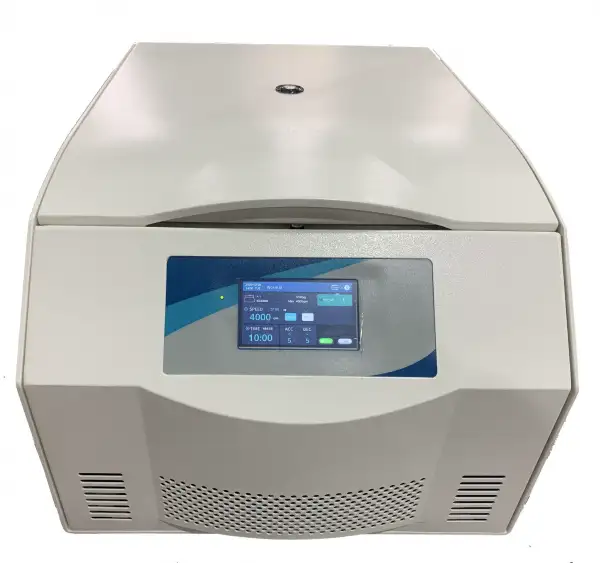
Laboratory Low Speed Centrifuge BCBL-306
- 1. Microprocessor control, LCD color display with touch key screen in speed, time, RCF in operation, speed raising and reducing quick, operate simply.
- 2. Brushless DC frequency motor with simpler construction,more reliable performance,longer life and quietly running.
- 3. Electric lid lock, super speed, over temperature protection and imbalance protection.
- 4. Adapters are available by experiment requirements.
- 5.The centrifuge body is made of high quality steel and the centrifuge is with three layers protection of steel structure, safe and reliable.
- 6. CE, ISO 9001 & ISO 13485 approved.
 Get Quote
Specifications
| Model | BCBL-306 |
| Max. Speed | 5000rpm |
| Max. RCF | 4730xg |
| Max. Capacity | 4x250ml |
| Time Range | 0~99min59sec |
| Noise | ≤ 58dBA |
| Speed Accuracy | ± 20r/min |
| Voltage(V/Hz) | AC 220V 50HZ 5A |
| Size (W x D x Hmm) | 568x400x320mm |
| Net Weight(Kg) | 35KG |
| Package | carton box |
Features
2. Brushless DC frequency motor with simpler construction,more reliable performance,longer life and quietly running.
3. Electric lid lock, super speed, over temperature protection and imbalance protection.
4. Adapters are available by experiment requirements.
5.The centrifuge body is made of high quality steel and the centrifuge is with three layers protection of steel structure, safe and reliable.
6. CE, ISO 9001 & ISO 13485 approved.
Accessories For Purchase
| Name | Max Speed (rpm) | Max Volume (ml) | Max. RCF (xg) |
| Swing out rotor | 4000 | 4x250ml (round cup) | 2880 |
| Swing out rotor | 4000 | 4x250ml (square cup) | 2830 |
| Swing out rotor | 5000 | 4x50ml | 4730 |
| Swing out rotor | 5000 | 4x100ml | 4730 |
| Swing out rotor | 4000 | 8x50ml | 2950 |
| Swing out rotor | 4000 | 16x15ml | 2950 |
| Swing out rotor | 4000 | 24x15ml | 2950 |
| Swing out rotor | 4000 | 48x5ml vacuum tube | 2480 |
| Swing out rotor | 4000 | 48x7ml vacuum tube | 2760 |
| Swing out rotor | 4000 | 40x10ml vacuum tube | 2880 |
| Name | Max Speed (rpm) | Max Volume (ml) | Max. RCF (xg) |
| Swing out rotor | 4000 | 32x10ml vacuum tube | 2580 |
| Swing out rotor | 4000 | 32x7ml vacuum tube adapter | 2580 |
| Swing out rotor | 4000 | 32x5ml vacuum tube adapter | 2580 |
| Swing out rotor | 4000 | 24x10ml vacuum tube | 2580 |
| Swing out rotor | 4000 | 24x7ml vacuum tube adapter | 2580 |
| Swing out rotor | 4000 | 24x5ml vacuum tube adapter | 2580 |
| Swing out rotor | 4000 | 16x10ml vacuum tube | 2580 |
| Swing out rotor | 4000 | 16x7ml vacuum tube adapter | 2580 |
| Swing out rotor | 4000 | 16x5ml vacuum tube adapter | 2580 |
| Micro plate rotor | 4000 | 2X3x48 well | 2300 |
| Micro plate rotor | 4000 | 2X2x96 well | 2490 |
Operating Manuals
 Download Manual (PDF)
1. Safety Notices
1.1 Safety During Installation and/or Maintenance
1.2 Electrical Safety
1.3 Safety against Risk of Fire
1.4 Chemical and Biological Safety
2. Summarization of BCBL-306 Centrifuge
3. The features of Centrifuge as below shown:
3.1 Main specification and technical parameters:
3.2 Rotor Parameters:
4. Unpacking
5. Installation
6. Operation
7. Trouble shooting service
8. Warranty Policy
1. Safety Notices
Dear Customer,
To prevent any potential accident, please carefully read and fully understand the following safety instruction before you operate centrifuges. If neglected, personal injury and /or instrument damage can be caused.
The safety reminders are indicated as shown below. The signal words " DANGER", "WARNING" AND " CAUTION " are indicated together with the hazard alert symbols in this manual.
 DANGER: This note indicates an imminently hazardous situation, which
if not strictly observed, could result in personal severe injury.
WARNING: This note indicates a potentially hazardous situation, which if not strictly observed, could result in personal severe injury or pollution of the environment.
1. For operator safety, maintain a 30-cm "clearance envelope "around the instrument while the rotor is spinning.
2. Do not store dangerous substances capable of developing flammable or explosive vapors in the clearance envelope.
3. Do not attempt to unlock the door forcefully while the rotor is spinning.
4. Do not attempt to slow or stop the spinning rotor by hand.
5. Do not use any sample inapplicable to the rotor (including buckets), like corrode chemical material.
6. Do not incline or move the instrument while the rotor is spinning. Do not lean on the instrument.
7. Do not exceed the maximum rated speed of the rotor or buckets in use.
8. Do not use corroded, scratched or cracked rotor, buckets and assemblies. Check that the rotor, buckets and assemblies are free of such abnormalities before operation.
If abnormal sound or vibration occurs, stop the operation immediately and contact the machine supplier.
CAUTION: This note indicates a potentially hazardous situation, which if not strictly observed, could result in personal injury or severe damage to the instrument.
1. Do not use any sample inapplicable to the tubes, the bottles, the tube racks, the micro-plates or tube/bottle caps, etc. Using such a sample could deteriorate them.
Maximum rotor speed depends on the buckets, assemblies, tubes or adapters to be used.
2. Do not exceed the allowable imbalance.
3. Use the rotor tubes and bottles within their actual capacities.
4. Mount the rotor onto the drive shaft gently and properly. Do not drop the rotor or apply excessive force to the drive shaft to avoid damage to the drive shaft. Please see the picture and video!
5. Clean the inside of the drive hole (crown hole ) of the rotor and surface of the drive shaft (crown) of the centrifuge once a month.
6. If dew drops are in the rotor chamber, drain the chamber through the drain hose to prevent the sample to get mixed up with them or prevent them from leaking into the drive unit. Be sure to recap the drain hose after drainage.
7. Do not pour any solution such as water, detergent and disinfectant directly into the rotor chamber. Otherwise, the bearings of the drive unit may be corroded or deteriorated.
8. Before relocating the centrifuge, remove the rotor from the rotor chamber to avoid damaging to the drive shaft.
9. Always keep the liquid crystal panel in a visible position while the POWER switch is turned on so that you can check the current operating state (running or stopping).
"NOTE" indicates a note which has no direct bearing on personal safety
1.1 Safety During Installation and/or Maintenance
WARNING:
1. Level he centrifuge by using the four level adjusters and secure them completely. Improper securing can cause significant movement of the centrifuge in the event of rotor disengagement.
2. When servicing the centrifuge, be sure to turn off the POWER switch, turn off the distribution board of your centrifuge room, and then wait for at least three minutes before removing covers or tables from the centrifuge to avoid electrical shock hazards.
CAUTION: Avoid a place exposed to ultraviolet rays for operation or storage of the centrifuge. Otherwise, the covers can be discolored and the coating can be peeled off easily. If installation in such place is unavoidable, cover the centrifuge with a cloth after operation to protect from ultraviolet rays.
1.2 Electrical Safety
WARNING: Your centrifuge must be grounded properly to avoid electrical shock hazards. And this centrifuge is 220/110Voltage.
CAUTION: Do not place containers holding liquid in the rotor chamber or on or near the instrument. If they spill, liquid may get into the instrument and damage electrical components.
1.3 Safety against Risk of Fire
WARNING: This instrument is not designed for use with materials capable of developing flammable or explosive vapors. Do not centrifuge such materials in this instrument nor handle or store them near the instrument.
1.4 Chemical and Biological Safety
WARNING: 1.Make sure to prepare necessary safety measures before using
samples that are toxic or radioactive samples or pathogenic or infectious blood samples at your own responsibility.
2. If the centrifuge, rotor or the accessory is contaminated by toxic or radioactive samples or pathogenic or infectious blood samples, be sure to decontaminate it according to good laboratory procedures and methods.
3. If there is a fear that the centrifuge, rotor or the accessory is contaminated by toxic or radioactive samples or pathogenic or infectious blood samples that impair human health, it is your responsibility to sterilize or decontaminate the centrifuge, rotor or the accessory properly.
2. Summarization of BCBL-306 Centrifuge
BCBL-306 centrifuge is table top low speed centrifuge , it is high performance, low noise and less vibration equipment. The maximum speed is 5000r/min, the maximum RCF is 4730xg, and the maximum volume is 4x250ml.
3. The features of Centrifuge as below shown:
• It uses brushless frequency motor drive which in great torque.
• Microprocessor control system & soft touch control panel.
• Digital display which indicates run parameters.
• Safe lid interlock with alarm.
• There are 10 kinds of acceleration and deceleration for your choice.
• It is produced as per the International Standard IEC61010-2-20:1992, and State Standard GB4793.7-2001.
3.1 Main specification and technical parameters:
The Max.speed | 5000 r/min |
The Max.volume | 4x250 ml |
The Max.RCF | 4730xg |
Timer | 0~99min |
Speed Accuracy | ±20 r/min |
Noise | ≤55dB(A) |
Power supply | 220/110V 50/60Hz 5A |
Product dimension | 528mmx370 mmx280mm |
Table 1
3.2 Rotor Parameters:
Rotor No. | Rotor type | Max speed (rpm) | Max Volume(ml) | Max RCF (g) |
No.30569 | Swing out rotor | 4000 | 4x250ml (round cup) | 2880 |
No.30568 | Swing out rotor | 4000 | 4x250ml (square cup) | 2830 |
52x10ml (16x100mm) | ||||
No.31377 | Swing out rotor | 5000 | 4x50ml | 4730 |
4x100ml | ||||
No.31378 | Swing out rotor | 4000 | 8x50ml | 3020 |
16x15ml | ||||
24x15ml | ||||
4000 | 48x5ml vacuum tube | 3020 | ||
48x7ml vacuum tube | ||||
40x10ml vacuum tube | ||||
No.31378 | Swing out rotor | 4000 | 32x10ml vacuum tube | 3020 |
32x7ml vacuum tube adapter | ||||
32x5ml vacuum tube adapter | ||||
24x10ml vacuum tube | ||||
24x7ml vacuum tube adapter | ||||
24x5ml vacuum tube adapter | ||||
16x10ml vacuum tube | ||||
16x7ml vacuum tube adapter | ||||
16x5ml vacuum tube adapter | ||||
No.30627 | Angle rotor | 5000 | 30x15ml/10ml | 3830 |
NO.31364 | Microplate rotor | 4000 | 2x2x96 well | 2490 |
NO.30643 | Angle rotor | 4000 | 12x100ml | 2970 |
Table 2
Remark: the above 15ml tube size is 17x120mm(falcon),10ml tube size is 16x100mm,7ml is 13x100mm,5ml is 13x75mm.
4. Unpacking
Please check whether there are serious damages on the package as soon as you received the centrifuge. If so, please take its photo and contact us directly. If not, please unpacking the package take out the instruction manual, checking the components and accessories. If you found something missing, please tell us.
5. Installation
The centrifuge should be installed in a stable working table, let its four rubber feet touch the even surface of the table. And then insert one head of the power plug into the socket which mounted on the rear of the centrifuge. Insert another head of the plug into the power supply socket. (attention: the power supply socket must be connected with the earth in case of electric shocks)
6. Operation
Power on
Power switch is located on the right bottom corner of control panel. Turn it to "I" position, the centrifuge is power on(while it turns to "O" position, the centrifuge is power off).
1. Checking whether the round nut in the rotor is loose or not, if so, fasten them.
2. Prepare the tubes; put the test liquids into the tubes, checking whether they are in the same level with your eyes.
3. Load the tubes on the tube rack symmetrically; otherwise it will be resulted in severe vibration in the process of centrifugal or cause accident.
4. Close the lid, make sure it is locked.
5. Set parameters

Figure 1
① Speed/RCF/Rotor No. screen
② Timer screen
③ open the lid
④RCF
⑤+/- key for speed
⑥+/- key for run time
⑦Start the centrifuge
⑧ Stop the centrifuge
⑨ start light and stop light
In "①" Rotor No./Speed/RCF conversion window
You can circularly press the button RCF . It will respectively display rotor no., speed and centrifugal force (RCF).
Note: it will originally display "speed".
(1)Set the speed
As shown in Chart 1, pressing button⑤ ,speed range from 0rpm to maximum 4000rpm;pressing button⑤ ,speed will be down.Set the speed you prefer, after the digital tube flashes twice, then the setting speed will store automatically.
(2)Set RCF
As shown in Chart 1, Pressing ④RCF button ,the display window ① will show the RCF;pressing button⑤ △, the RCF range from 0 to maximum. Pressing button ⑤ ▽, the RCF will be down. Set the RCF you prefer, after the digital tube flashes twice, then the setting RCF will storage automatically.
(3) Select Rotor NO.
It shows the parameters of rotors. It will display the last 2 number of the rotor. For example: 24x15ml swing rotor no.31378, it was set no. 78. So if you need use this rotor, please select no.78
(4)Set the time
As shown in Chart 1, pressing time button ⑥ , the time range from 0 minute to 99 minutes, then pressing time button ⑥ ,the time will be down.Set the speed and time you prefer, after the digital tube flashes twice, then the setting speed will storage automatically.
(5)Set deceleration and acceleration.
It will be done as b4 or b5 default in factory. Different solution test has different requirement for the deceleration and acceleration rate, so we can set the corresponding deceleration and acceleration. When in power off, long time pressing Stop key, instrument has a sound with "di", time screen display .Press △,▽ under time screen to select suitable deceleration and acceleration rate. After setting the parameter, no need to press any key, parameters can be stored automatically.5seconds later, change to time display automatically. There are 10 grades can be chosen (0-9), the larger of the No, the quicker of the deceleration and acceleration rate.
Start the centrifuge
Press the "start" button, the green light of the "start" button will be brighten, the instrument start to run, the speed window display speed; 1-2 minutes later, the speed will rise to the setting speed. When the time counts down to zero, the centrifugation is over. And the red light will be brighten. When the speed counts down to zero, and the rotor is stopping running, the lid can be open.
Stop the centrifuge
It will cut off the electricity automatically in the process of operation when the centrifugal time is 0, the red light will be on , it will decelerating according the parameters you set, when you hear the buzz sound, the rotors will stop, the instrument also will stop running.
Open the lid
Press the button③, the lock will be unlocked, when you hear the "buzz" sound, pull the lid in upward direction, the gas spring will help you open the lid, then take out the sample, all the centrifugation process finished. For you safety, the lid only can be open when the speed turns to 0 rpm.
All kinds of break down shows in table below
E1 | E2 | E3 | E5 | E6 | E7 | E8 |
Cover unclosed | driver error | Voltage error | current error | sending error | receiving error | Over speed |
Table 3
7. Trouble shooting service
Trouble | Cause | Removal |
The display window is not working when power is connected | No 220/110V power supply | Check the power supply |
Fuse is broken | Check and replace fuse | |
The rotor doesn't run when Start key is pressed | The connector to circuit board is not properly connected. | connect it properly |
The power transformer is broken. | Replace the transformer | |
The motor is powered on, but it doesn't work. The motor is damaged. | Replace the motor | |
Abnormal vibration of the centrifuge | The tube in the rotor is not arranged symmetrically. | Check and rearrange Properly. |
The test tube is broken. | Check and replace the broken tube | |
The rotor is not turned tightly. | Check | |
The shock absorber is damaged | Replace the damaged shocking absorber |
Table 4
8. Warranty Policy
1. We have one -year warranty on our all products
2. After the machine is fixed, our professional technician will file it and keep track of the usage of the machine.
3. We will pay attention to the feedback of the customers within 24 hours.
4. We won't charge customers any money for repairing the machine in one-year warranty time.
5. We only charge for the accessories on repairing the machine beyond the one-year warranty time.