Get Price
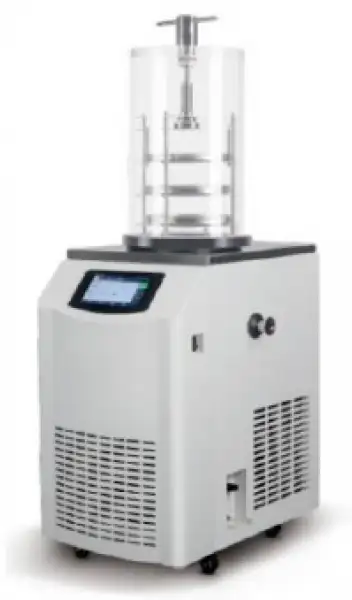
Laboratory Benchtop Freeze Dryer BFFT-413
- Development and production of freeze-drying machines, the Pioneer laboratory freeze-dryer's performance, stability, and control system all reach the top industry standards:
- 7 inch touch-control system,simple operation.
- Display Critical data: condenser temperature,sample temperature and vacuum;display graph and data recording. vacuum and temperature correction to ensure long-term accuracy in use.
- Power-off auto-recovery function: Allows customers to set the power-off restart time Alarm and prompt functions to prevent misoperation.
 Get Quote
Specifications
| Model | BFFT-413 |
| condenser temperature | -60°C |
| Ice condenser capacity | 4L/24h |
| Dimension(mm) | 392*557*683 (without chamber) |
| Vacuum pressure(Pa) | <1Pa (standard <5Pa) |
| vacuum pump | 2XZ-2 (2L/S) |
| *optional vacuum pump | DRV-10 (10^3/h) |
| *vacuum control(optional) | |
| Refrige system | Auto Cascade |
| Defrost | Heating coil |
| Rated power | 1350W |
| Net weight(Appro) | 55kg (without vacuum pump, vacuum pump 20kg) |
Features
7 inch touch-control system,simple operation.
Display Critical data: condenser temperature,sample temperature and vacuum;display graph and data recording. vacuum and temperature correction to ensure long-term accuracy in use.
Power-off auto-recovery function: Allows customers to set the power-off restart time Alarm and prompt functions to prevent misoperation.
Optional mobile phone/computer remote monitoring.

Accessories For Purchase
| Images | Name |
 | DRV Vacuum Pump |
| vacuum control |
Operating Manuals
 Download Manual (PDF)
1. INTRODUCTION
2. PREREQUISITES
3. USING YOUR FREEZE DRYER
4. MAINTAINING YOUR FREEZE DRYER
5. TROUBLESHOOTING
1. INTRODUCTION
Congratulations on your purchase of our Freeze Dry System, which is designed for laboratory lyophilization procedures. The refrigerant used in the refrigeration system is CFC-free so it will not endanger the environment. The unit is easy to install and maintain. Proper care and maintenance of this product will result in many years of dependable service.
Freeze Dry Process
Freeze drying is an important process in sample prep procedures and for the preservation and storage of biologicals, pharmaceuticals and foods. Of the various methods of dehydration, freeze drying (lyophilization) is especially suited for substances that are heat sensitive. Other than food processing (e.g., coffee, whole dinners), freeze drying has been extensively used in the development of pharmaceuticals (e.g., antibiotics) and preservation of biologicals (e.g., proteins, plasma, viruses and microorganisms). The nondestructive nature of this process has been demonstrated by the retention of viability in freeze dried viruses and microorganisms.
Freeze drying is a process whereby water or other solvent is removed from frozen materials by converting the frozen water directly into its vapor without the intermediate formation of liquid water. The basis for this sublimation process involves the absorption of heat by the frozen sample in order to vaporize the ice; the use of a vacuum pump to enhance the removal of water vapor from the surface of the sample; the transfer of water vapor to a collector; and the removal of heat by the collector in order to condense the water vapor. In essence, the freeze dry process is a balance between the heat absorbed by the sample to vaporize the ice and the heat removed from the collector to convert the water vapor into ice.
About This Manual
This manual is designed to help you learn how to install, use, and maintain your Freeze Dryer. Instructions for performing routine maintenance and making minor modifications to your Freeze Dryer are also included.
2. PREREQUISITES
Before you install your Freeze Dryer, you need to prepare your site for installation. Carefully examine the location where you intend to install your Freeze Dryer. You must be certain that the area is level and of solid construction. An electrical source must be located near the installation site.
Electrical Requirements
The Freeze Dryer requires a dedicated electrical outlet. This outlet requires a 15 Amp circuit breaker or fuse is required for models rated at 230V (50 Hz). The power cord on 230V models are equipped with a plug on the power cord. It will be necessary to change a plug to match the available receptacle.
Unpacking Your Freeze Dryer
Carefully unpack your Freeze Dryer and inspect it for damage that may have occurred in transit. If your Freeze Dryer is damaged, notify the delivery carrier immediately and retain the entire shipment intact for inspection by the carrier.
Setting Up Your Freeze Dryer
After you verify receipt of the proper components, move your Freeze Dryer to the location where you want to install it. Then, follow the steps listed below.
Component Orientation
The refrigeration system in the Freeze Dryer draws air in through the bottom of the cabinet and exhausts air out through the rear sides. A minimum of 2" should be allowed between the back and sides of the Freeze Dryer and the adjacent wall surface. Restriction of the airflow through the cabinet during operation could adversely affect performance.
Vacuum Pump Connection
A vacuum pump is required to operate your Freeze Dry System properly. The Freeze Dryer is equipped with a 25mm ID, heavy wall, vacuum hose for connecting the collector chamber to the vacuum pump.
Make certain that the oil in the vacuum pump is at the proper level.
Place the vacuum pump near the benchtop Freeze Dryer models, or place the vacuum pump on the floor.
Connect the vacuum pump power cord to the receptacle on the side of the cabinet labeled "vacuum pump" , If the vacuum pump has an off/on switch, turn the switch on. The vacuum pump will be controlled by the Freeze Dryer. Connect the vacuum pump inlet port to the vacuum tube on the right side of the cabinet with the vacuum hose and clamps provided. If necessary, cut the hose to proper length to allow for gentle bends without kinks.
Electrical Connection
Plug the power cord into the receptacle on the back side of the Freeze Dryer and plug the other end into a suitable power receptacle.
Drying Chamber or Drying Manifold Installation
The drying chamber or drying manifold, purchased separately, may be positioned directly above the 3-inch hole in the collector chamber lid. When vacuum is applied to the system, the chamber will be held securely in place.
The installation and setup of your Freeze Dryer is now complete.
3. USING YOUR FREEZE DRYER
After your Freeze Dryer has been installed, you are ready to begin using your Freeze Dryer.
Conditions of use:
1. Ambient temperature under normal working conditions: 10 °C~ 28 °C
Relative humidity: ≤ 70%
Power supply voltage: single phase 220 V ± 10% 50 Hz
The working environment should be free from conductive dust, explosive, corrosive gas and strong electromagnetic field interference.
2. Transportation and storage conditions: ambient temperature: - 40 °C ~ 50 °C
Relative humidity: ≤ 93%
The storage environment should be well ventilated and free of corrosive gases.
3. The safety classification is class I and type B.
Vacuum dry
1,Basic type:
(1)Take out the pre frozen material tray from the cold trap and quickly install it into the drying rack. Put the drying rack above the cold well and cover it with a plexiglass cover. The lower end of the cover should be in full contact with the "0" sealing ring.
(2) Confirm that the black valve on the side has been closed (the arrow of the black valve is open when the arrow of the black valve is facing the outlet pipe, otherwise it is closed). Press the "vacuum pump" key and "vacuum meter" key, the vacuum pump will work, and the vacuum degree will drop rapidly. It will be normal when it is below 15pa, and the freeze-drying will start.
Note: in order to prevent the vacuum pump from returning oil, it is necessary to place the vacuum pump at a level lower than the main engine.
(3) After 24 hours, the material is completely dry. Open the black valve on the side. After inflation, close the "vacuum pump" key and "vacuum gauge" key. The vacuum pump stops running and turns off the "refrigeration" key.
(4) Remove the plexiglass cover and take out the material tray from the drying rack. The materials in the plate can be packed. At this point, the drying is completed
(5) Place a water container under the side outlet pipe and click "defrost" to wait for the ice in the cold trap to melt out.
Note: the water / ice should be removed before the next experiment, and the defrosting should be turned off after 30-60 minutes of defrosting.
2,Top-down type:
(1)Put the pre frozen vials (in the tray) into the gland drying rack, and then put the shelf above the cold trap. Cover it with a plexiglass cover. The lower end of the cover should be in full contact with the "0" sealing ring.
(2)Confirm that the black valve on the side has been closed (the arrow of the black valve is open when the arrow of the black valve is facing the outlet pipe, otherwise it is closed). Press the "vacuum pump" key and "vacuum meter" key, the vacuum pump will work, and the vacuum degree will drop rapidly. It will be normal when it is below 15pa, and the freeze-drying will start.
(3)After 24 hours, it is felt that the material has been completely dried. Turn the handle above the plexiglass cover to make the screw of the cap frame rotate, so that the original plate moves down, and the bottle cap is pressed into the bottle to realize the capping in vacuum.
(4)Inflate, turn off the pump, remove the plexiglass cover, take out the material bottle for storage, and drain water (refer to the ordinary type for the process of removing the cover)。
3,Adding Sample
The following procedure should be followed when using sample valves in the freeze dry process:
After 24 hours")
Figure 1
1. Connect a pre-frozen sample to a sample valve on the drying chamber or manifold using an adapter. After connecting a pre-frozen sample to a valve, turn the plastic valve knob to the downwards position to open the valve, which connects the attached sample to system vacuum. The bevel on the knob should be positioned downwards.
2. Before adding another sample bottle, allow system vacuum to return to 40Pa or lower. Any combination of valves and sample sizes may be utilized at one time provided that the system vacuum and collector temperature remain sufficiently low to prevent melting of the frozen sample.
3. When all the frost has disappeared from the outer surface of the sample container and no cold spots can be detected by handling the container, the sample is nearly dry. To be certain of low final moisture content, dry the sample for several hours past this point.
4. To remove a sample bottle after drying is complete, turn the plastic knob on the valve to the upwards position, which closes the valve and vents the container. The sample bottle may now be removed.
5. Ampules may be flame sealed while connected to a valve by using a sealing torch. Care must be taken not to burn the valve. An insulation material placed between the valve and the torch is recommended.
Shut Down
At the end of a run or when a sufficient amount of condensate accumulates on the collector to obstruct the flow of vapor to the collector chamber, the Freeze Dryer should be defrosted. First, release system vacuum by turning the stainless screw ,Now press the vacuum switch on the control panel to turn the vacuum pump OFF. Press the Refrigeration Switch to turn OFF the refrigeration system. Turn OFF the main power switch on the back side of the cabinet.
Defrosting
The following procedure should be followed when defrosting the collector:
1. Install the drain hose plug from the back side of the Freeze Dryer. Place the drain hose in a suitable container to collect the condensate that will melt off the collector .
2. Remove the collector chamber top and allow ambient room air to melt the ice or switch on the Defrost button(this is optional ). Dispose of the liquid appropriately.
3. Flush the collector chamber with water and wipe chamber dry.
4. If rapid defrost is desired, pour warm water over the collector . Do not allow the liquid to enter the vacuum port on the upper rear of the chamber.
5. Pulling the drain hose plug out, and put drain hose back into the side of the cabinet. Dispose of the liquid appropriately.
Freeze Dryer Controls
The control panel for the Freeze Dryer is shown below with a
description about its function.
1,Turn on the "main power" switch, and the system will display "company trademark and name". Press "confirm" key to enter the "operation and status display" interface automatically (as shown in the figure below)

Figure 2 Display
2, Curve: display and record the temperature and vacuum degree during operation (as shown in the figure below)

Figure 3

Figure 4
1. Setting: various parameters of system operation (as shown in the figure below)

Figure 5
Note: please contact the manufacturer's technical personnel before changing
1. Run Time- This display indicates running time after switch on.
2. Refrig - Manual refrigeration switch ,Used to start or stop the refrigeration compressor.Green colored indicates the refrigeration is on;gray colored indicates the refrigeration is off.
3. Vacuum &Vacuum gauge- Used to start or stop the vacuum pump, The power is being supplied to the vacuum pump receptacle on the back side of the Freeze Dryer.
Green colored indicates the refrigeration is on;gray colored indicates the refrigeration is off.
You can start the vacuum pump when the collector temperature reaches -40°C or lower.
4. Sample temperature-this shows the temperature of the sample.
5. Condens temperature. - this shows the temperature of the sample of the freeze dryer.
6. Vacuum-Vacuum display, This display indicates the relative system
vacuum level.
7.The button  is the switch of the curves ,press this button will go to show the curves.
It can shows the sample temperature,condenser temperature ,vacuum temperature and the combined of the three curvers in different colors.
Operation Checklist
The following checklist should be followed prior to each use of your Freeze Dryer:
1. Wipe the interior of the collector chamber with a soft cloth or paper towel to remove any accumulated moisture.
2. Check the collector chamber drain hose to ensure that the hose is free of moisture and that the drain plug is securely installed. The freeze dryer will not start if moisture is detected.
3. Using a soft, lint-free cloth or paper towel, wipe the collector chamber lid gasket to remove any dirt and contaminants that could cause a vacuum leak. Vacuum grease is not required on the lid gasket to obtain a proper vacuum seal.
4. Remove the accessory drying chamber or manifold from the connection port and using a soft, lint-free cloth or paper towel, wipe the port gasket and sealing surfaces of the drying chamber/manifold to remove any dirt and contaminants that could cause a vacuum leak. Reinstall the drying chamber or manifold on the port. Vacuum grease is not required on the port gasket to obtain a proper vacuum seal.
5. Check that each sample valve is closed or in the "upwards" position.
4. MAINTAINING YOUR FREEZE DRYER
Under normal operation, the Freeze Dryer requires little maintenance. The following maintenance schedule is recommended:
As needed:
1. Clean up all spills; remove liquids from the chamber.
2. Clean lid and gasket using soft cloth, sponge or chamois and a mild, non-abrasive soap or detergent.
3. Check oil level of the vacuum pump. It should be over the middle line of oil mirror, If the oil level is lower, add oil to proper level.
4. If oil shows cloudiness, particles or discoloration, drain the pump and replace with fresh oil.
5. Utilization of acids requires immediate cleaning and neutralization after a run or physical damage to the collector chamber and collector coil will result.
6. Check the collection chamber for condensed or frozen solvents and dispose of appropriately. Completely empty the collector chamber before the next run or before starting the vacuum pump.
7. If chamber or manifold valves leak or stems become difficult to turn, pull the stem out of the rubber valve body and apply a thin coat of vacuum grease to the stem. Reinsert the stem into the valve body.
5. TROUBLESHOOTING
Refer to the following if your Freeze Dryer fails to operate properly. If the suggested corrective actions do not solve your problem, contact us for additional assistance.
Freeze Dry Systems should reach a vacuum of 999Pa or lower within 10 minutes, and should achieve an ultimate vacuum of 15Pa or lower within 30 minutes when the refrigeration is operating. If the Freeze Dryer does not obtain a satisfactory vacuum, perform the following maintenance tests.
I. Vacuum Pump
First make sure that the vacuum pump operates. If it fails to operate, check the electrical connections of the Freeze Dryer to the power source and then check the electrical connection of the vacuum pump to the Freeze Dryer. If the vacuum pump has a power switch, make sure that it is turned on. If the vacuum is not adequate when the vacuum pump is operating, proceed with the following steps:
1. Check the oil and ensure it is clear and clean. If the oil looks cloudy or has any particulates, replace the pump oil. Sometimes it may be necessary to flush the pump with
clean oil several times. To flush the pump, run the pump 5 to 10 minutes to allow the oil to warm up. Drain the oil and refill with clean oil. Repeat as necessary.
2. Check the oil level in the pump. Ensure it is filled to the correct level.
3. Check vacuum hose connections from the pump to the Freeze Dryer and try running the unit.
II. Gaskets, Tubing, Connections, Sample Valves
1. Inspect gasket(s) for cracks or defects. Ensure the gasket is clean. Apply a thin coat of vacuum grease to the gasket. Keep in mind, too much vacuum grease can actually cause leaks.
2. Check the drain line and ensure the drain plug is installed and the tube appears to be in good condition.
3. Check all rubber vacuum tubing for signs of deterioration or cracking.
4. Check all connections and make sure they are secure and leak tight.
5. Check all sample valves on the drying chamber/manifold and ensure all valves are closed or in the vent position. Check to ensure all fittings are tight and sealed properly against the chamber. Inspect valves for cracks or cuts.


Total power supply + fuse Vacuum pump socket + fuse
 Hoop and washer
 Air valve or bottom water valve