Get Price
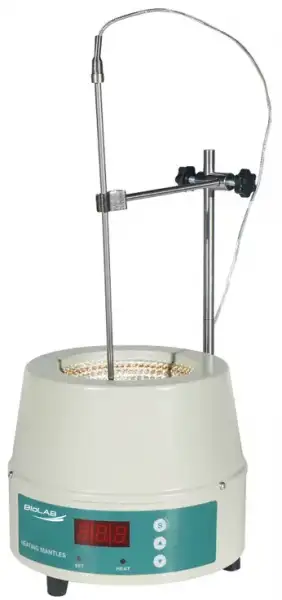
Heating Mantle BER-4602
- 1. PID single screen temperature controller. Fast heating, good temperature uniformity and high precise temperature control.
- 2. Several rows type, produce as customer inquiry, beautiful shape, easy to operate and effective. Beautiful shape, easy to operate and effective.
- 3. PT100 Temperature sensor, with adjustable sensor rack and stainless rods.
- 4. Up to 450°C general heating equipment.
 Get Quote
Specifications
| Model | BER-4602 |
| Function | |
| Capacity | 100ml |
| Heating Mode | Surface heat-conduction |
| Surface Max.Temp.(°C) | 450°C |
| Temperature control range | RT+20~250°C |
| Structure | |
| Heating Element | Nichrome wire |
| Insulation Layer | High quality aluminum silicate cotton (with CE) |
| Shell | Cold roller steel plate, surface spraying |
| Heating Power (kW) | 0.1 |
| Controller | |
| Working Mode | Continuous |
| Specification | |
| Exterior Size (mm) | Φ220x165 |
| Packing Size (mm) | 230x230x195 |
| Voltage(V) | 100-120V or 200-240V |
| N.W. (Kg) | 2.5 |
| G.W. (Kg) | 2.8 |
Features
2. Several rows type, produce as customer inquiry, beautiful shape, easy to operate and effective. Beautiful shape, easy to operate and effective.
3. PT100 Temperature sensor, with adjustable sensor rack and stainless rods.
4. Up to 450°C general heating equipment.
Extra Info
Operating Manuals
 Download Manual (PDF)
Preface
Warranty
1. Safety Instructions
2. Proper Uses
3. Inspections
3.1 Receiving Inspection
3.2 Listing of Items
4. Trial Runs
5. Operating Modes
6. Faults
7. Maintenance and Cleaning
8. Storage and transportation
9. Working condition
Preface
Thank you for purchasing our products: Heating Mantle. Users should read this Manual carefully, follow the instructions and procedures, and beware of all the cautions when using this instrument.
Warranty
This instrument is warranted to be free from defects in materials and workmanship under normal use and service, for a period of 12 months from the date of invoice. The warranty is extended only to the original purchaser. It shall not apply to any product or parts which have been damaged on account of improper installation, improper connections, misuse, accident or abnormal conditions of operation.
For claims under the warranty please contact us. You may also send the instrument directly to our works or we will send you the spare parts to help you resolve this problem in the next order, enclosing the invoice copy and by giving reasons for the claim. You would be solely liable for freight cost.
|
|
|
|
|
|
|
|
|
 Connect the device to an earthed power supply to ensure safety of machine and experiment; connect the power as the machine required.
 This equipment is forbid to use in inflammable and explosive, poisonous and strong corrosive experiments.
 M ake sure horizontal installation.
 Pay attention to the set temperature while dealing with the inflammable matters.
 While the machine is working, don't touch the top, window and exhaust port of the device to protect from high-temperature burns.
Table 1
1. Safety Instructions
• When working, ware the personal guard to avoid the risk from:
• Splashing and evaporation of liquids
• Release of toxic or combustible gases.
◦ Set up the instrument in a spacious area on a stable, clean, non-slip, dry and fireproof surface; do not operate the instrument in explosive atmospheres, with hazardous substances or under water.
◦ Temperature must always be set to at least 25°C lower than the fir point of the media used.
◦ Beware of hazards due to:
• Flammable material or media with a low boiling temperature
• Overfilling of media
• Unsafe container
◦ Process pathogenic materials only in closed vessels.
◦ Check the instrument and accessories before hand for damage each time you use them. Do not use damaged components. Safe operation is only guaranteed with the accessories described in the "Accessories" chapter. Accessories must be securely attached to the device and cannot come off by themselves. Always disconnect the plug before fitting accessories.
◦ Ensure that the external temperature sensor is inserted in the media to a depth of at least 20mm.
◦ When using metal vessels, do not place the temperature sensors on the bottom of the vessel. Placing sensors on the vessel bottom can cause excessively high temperature to be measured especially in media which have poor conductivity. The tip of the measuring sensor must be at least 5mm from the vessel bottom, a distance of 10mm is ideal.
◦ The instrument can only be disconnected from the main power supply by pulling out the mains plug or the connector plug.
◦ The voltage stated on the label must correspond to the main power supply.
◦ Ensure that the mains power supply cable does not touch the heating base plate. Do not cover the device.
◦ Keep away from high magnetic field.
2. Proper Uses
The instrument is designed for mixing and / or heating liquids in schools, laboratories or factories. This device is not suitable for using in residential areas.
3. Inspections
3.1 Receiving Inspection
Unpack the equipment carefully and check for any damages which may have arisen during transport. If it happens, please contact manufacturer for technical support.
Note:
If there is any apparent damage to the system,
Please do not plug it into the power line.
3.2 Listing of Items
The packing includes the following items:
Digital Heating Mantle
Items Qty
Main Unit 1
Power Cable 1
User Manual 1
Rack Rods 1
Please check the instrument and appendix with the packing list when you first open the instrument packing case.
If you find there is something wrong with the instrument and the appendix, do contact the vendor or the producer.
4. Trial Runs
◦ Make sure the required operating voltage and power supply voltage match.
◦ Ensure the socket must be earthed reliably.
◦ Ensure the power be off
◦ Plug in the power cable, ensure the power be on and begin initializing.
◦ Add the medium into the vessel with a stirring bar if with the magnetic stirrer function.
◦ Put the vessel on the work plate.
◦ Adjust the stirring speed and start stirring if with the magnetic stirrer function..
◦ Observe the stirring bar and LCD display if with digital function.
◦ Adjust the temperature and start heating.
◦ Observe the real temperature on LCD display if with the digital function.
◦ Stop the heating and stirring functions.
If these operations above are normal, the device is ready to operate. If these operations are not normal, the device may be damaged during transportation, please contact manufacture for technical support.
5. Operating Modes
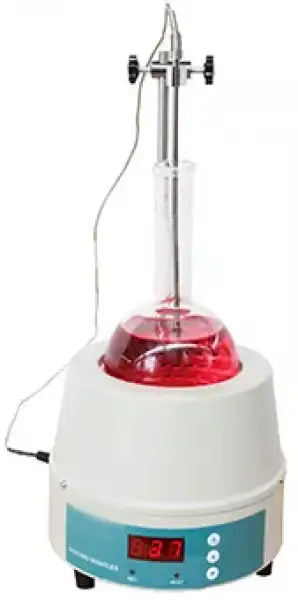
Rows Manual Heating Mantle:
◦ Place the equipment on level worktable, and then put the container with liquid inside into heating mantle.
◦ Install the Sensor Rack with Stainless Rods on the heating mantle back holder.
◦ Put the temperature sensor into the liquid.
◦ Press the S keyboard comes into the setting condition. Adjust the temperature by press the up and down keyboard.
◦ Press the S keyboard again to finish the temperature setting and then the equipment comes into the working condition.
 Notes:
The power must accord with the machine. Make sure the power line has safety G
distance from the heating mantle. 
When the machine meets fault please cut off the Electricity first.
6. Faults
• Instruments can't be power ON
Check whether the power cable is plugged
Check whether the fuse is broken or loose
• Temperature cannot reach set point or stirring can't be starts when adjust the control knob
Check whether the heating wire broke during transport
Check whether the controller broke during transport
If these faults are not resolved, please set the instruments to factory default setting, or take the unit to your technical service center, or contact with the manufacturer.
7. Maintenance and Cleaning
• Proper maintenance can keep instruments working in a good state and lengthen its lifetime.
• Be careful not spray the cleanser into the instrument when cleaning.
• Unplug t he power line when cleaning.
• Only use cleanser that we advised as below:
Dyes Isopropyl alcohol
Construction materials Water containing tenside/
Isopropyl alcohol
Cosmetics water containing tenside/
Isopropyl alcohol
Foodstuffs Water containing tenside
Fuels Water containing tenside
8. Storage and transportation
◦ Keep it in dry and clean room with good ventilation and no corrosive gas
◦ prevent it from wetting by the rain and avoid violent collision in transportation.
9. Working condition
◦ Ambient temperature: 5~40°C;
◦ Ambient humidity: ≤90%;
Voltage: 220V±10%, 50/60Hz or 110V+/-10%, 50/60Hz
Model | Capacity (ml) | Voltage (V) | Max Temp. | Power (W) | Working Time | Exterior Size (mm) | Packing Size (mm) | N.W. (KG) | G.W. (KG) |
BER-4601 | 50 | 220V, 50/60Hz and 110V/60Hz | 450°C | 80 | Continuous | Φ220x165 | 230x215x195 | 2.5 | 2.8 |
BER-4602 | 100 | 220V, 50/60Hz and 110V/60Hz | 450°C | 100 | Continuous | Φ220x165 | 230x215x195 | 2.5 | 2.8 |
BER-4603 | 250 | 220V, 50/60Hz and 110V/60Hz | 450°C | 150 | Continuous | Φ220x165 | 230x215x195 | 2.5 | 2.8 |
BER-4604 | 500 | 220V, 50/60Hz and 110V/60Hz | 450°C | 250 | Continuous | Φ220x165 | 230x215x195 | 2.5 | 2.8 |
BER-4605 | 1000 | 220V, 50/60Hz and 110V/60Hz | 450°C | 350 | Continuous | Φ270x220 | 280x280x300 | 5.5 | 6 |
Table 2