
Get Price
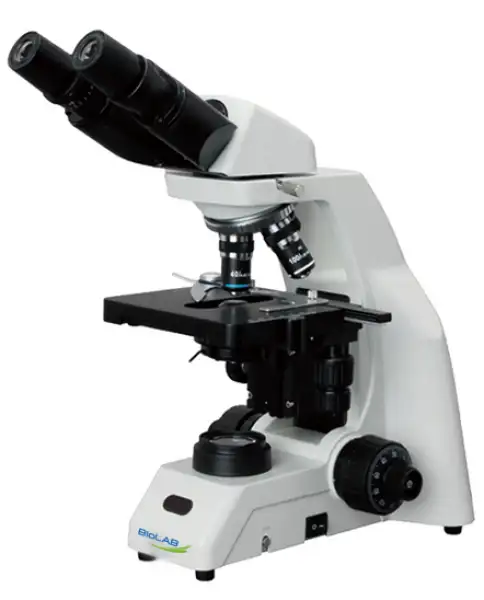
Biological Microscope BMIC-205-A
The Biological Microscope is a powerful scientific instrument for studying the microscopic world of biology. It offers high-resolution imaging, versatile observation modes, and precision controls, making it an indispensable tool for researchers, educators, and enthusiasts.
- Up to 3-Year Product Warranty
- US & EU Compliance Standards
- Door-to-Door Shipping
Technical Specifications
Detailed operating and construction parameters for this model.
| Model | BMIC-205-A |
| Optical System | Finite Optical System |
| Viewing Head | Seidentopf Binocular Viewing Head Inclined at 30°, Interpupillary 47~78mm |
| Eyepiece | Wide Field Eyepiece WF 10X/18 |
| Objective | Achromatic Objective 4X, 10X, 40X, 100X |
| Nosepiece | Backward Quadruple Nosepiece |
| Stage | Double Layers Mechanical Stage 140mmx140mm/75mmx50mm |
| Condenser | NA1.25 Abbe Condenser |
| Focusing System | Coaxial Coarse and Fine Adjustment, Fine Division 0.002mm, Moving Range 25mm |
| Illumination | S-LED Illumination, Brightness Adjustable |
| Accessories | Phase Contrast Kit, Fluorescent Attachment, Polarization Set |
| Power Supply | AC110~220V, 50/60Hz |
| Packing Size (mm) | 380x270x470mm |
| Gross Weight (kg) | 8.5 |
Operating Manual View instructions, operating procedures, safety information, and maintenance guidance.
1. User Notice
1.1. Safety Note
1.2. Maintenance and Care
2. Components Name
3. Assembly
3.1 Assembly Diagram
3.2 Assembly procedure
4. Adjustment and operation
4.1 Adjustment set diagram
4.2 Adjustment and Operation
5. Technical Specifications
5.1 Main Specifications
5.2 Eyepiece and objectives
6. Outfit
7. Troubleshooting Guide
7.1 Optical System
7.2 Mechanical System
7.3 Electrical System
1. User Notice
1.1. Safety Note
1. Open the box carefully to avoid the accessories, like lenses, dropping to the ground or being damaged.
2. Do keep the instrument out of direct sunlight, high temperature or humidity, dusty and easy shaking environment. Make sure the stage is flat, horizontal and firm enough.
3. When moving the microscope, carefully carry it with the handle and the base.
4. Make sure the instrument is earthed, to avoid lighting strikes.
5. For safety, be sure the main switch is in "O" (off) state and cut off the power supply before replacing the bulb or the fuse. If you replace the bulb during use or right after use, allow the lamp bulb and the lamp house to cool completely before touching.
(Designated bulb:1W S-LED or 6V20W Halogen Lamp)
6. Check the input voltage: be sure the input voltage which is signed in the back of the microscope is consistent with the power supply voltage, or it will bring a serious damage to the instrument.
7. Always use the power cord provided by Novel.
8. The electrical equipment of the microscope should be discard as electronic waste.
1.2. Maintenance and Care
1. All the lenses have been adjusted properly; do not dismount them by yourself please.
2. The nosepiece and coarse and fine focusing parts are so delicate that it is forbidden to disassemble them carelessly by yourself.
3. Keep the instrument clean, and do not pollute the optical element when wiping away the dust on the instrument.
4. The contaminations on the prism, like fingerprints and oil smudges, could be gently wiped with a piece of soft cloth or tissue paper, gauze which has been immersed in pure alcohol or ether. (Note that the alcohol and ether are highly flammable, do keep them away from the fire or potential sources of electrical sparks, and use them in a drafty room as possible as you can.)
5. Do not attempt to use organic solvents to clean the microscope components other than the glass components.To clean them, use a lint-free, softcloth slightly moistened with a diluted neutral detergent.
6. When using, if the microscope is splashed by liquid, cut off the power at once, and wipe away the splash.
7. Do not disassemble any parts of the microscope, as this will affect the function or reduce the performance of the microscope.
8. Place the instrument in a cool, dry position. When not using the microscope, keep it covered with a dust cover. Make sure the lamp socket is cool before covering the microscope.
2. Components Name
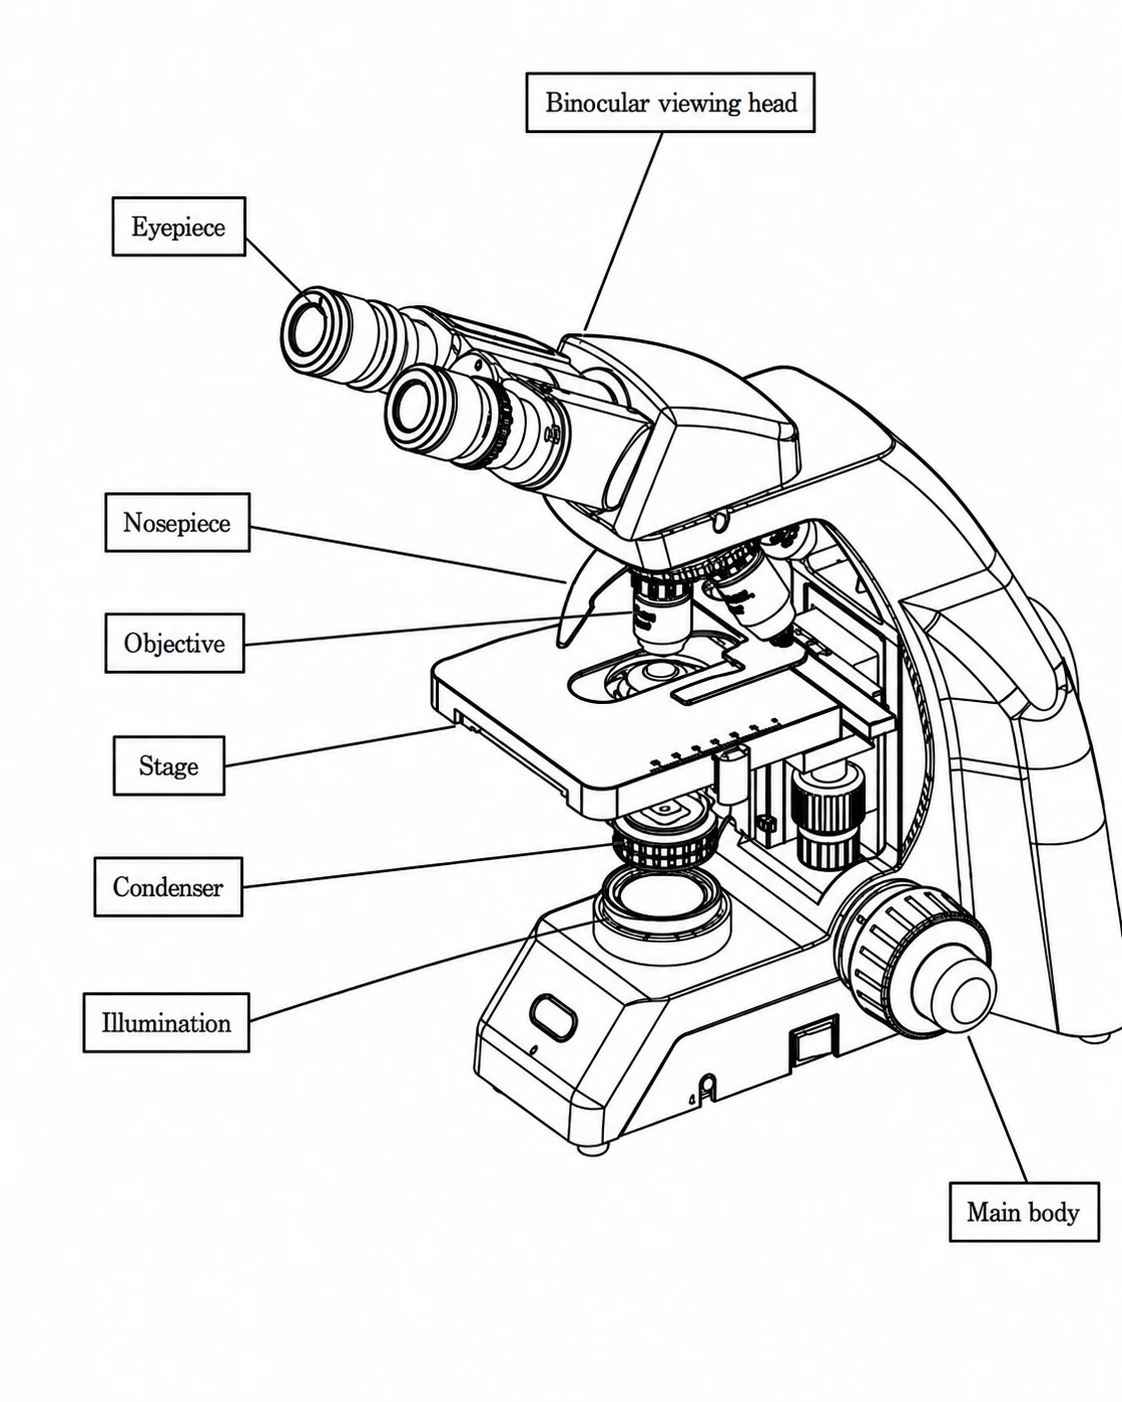
Figure 1
3. Assembly
3.1 Assembly Diagram
The following figure shows the installation sequence of the components. The number in the figure shows the assembly steps.
Before installing, be sure every components is clean, do not score any parts or glass surface.
Keep well with the hexagon wrench provided. When changing the components, you will need it again.
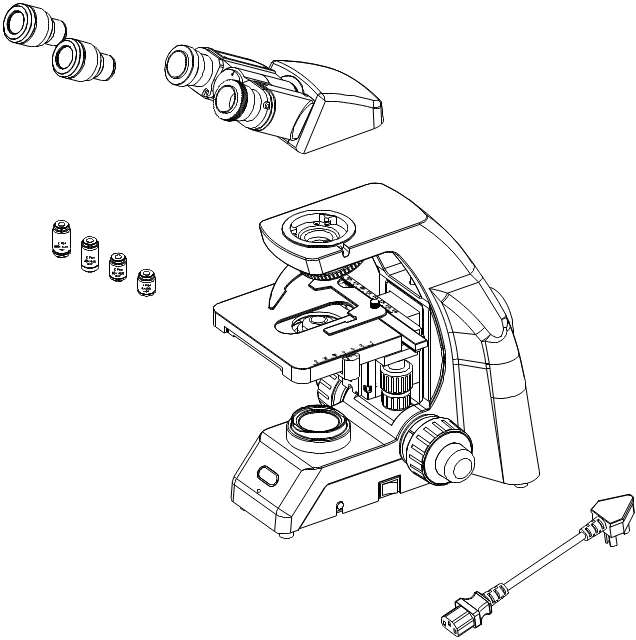
Figure 2
3.2 Assembly procedure
3.2.1Installing binocular viewing head
Insert the binocular viewing head into the microscope head and turn it to a proper position, then tight it.
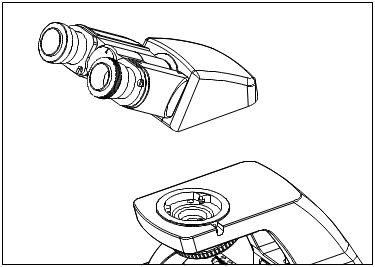
Figure 3
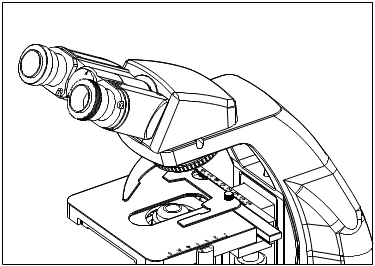
Figure 4
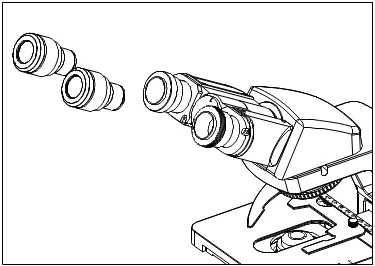
Figure 5
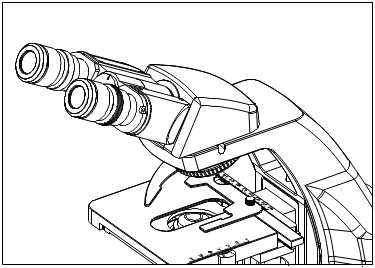
Figure 6
Figure 7
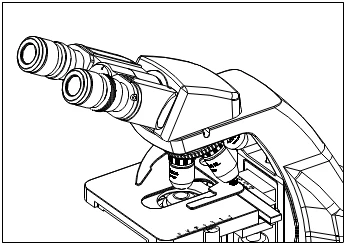
Figure 7
3.2.3Installing the objective
1. Adjusting the coarse focus knob until the support device of the mechanical stage reaches its low limit position.
2. Screw the lowest magnification objective into the nosepiece from the left or the right side, then revolve the nosepiece clockwise and mount other objectives by the sequence of low to high magnification
Installing objective this way will make the change of magnification to be easier during using.
Clean the objective regularly, for lens is susceptible to dust.
When operating, use 10xmagnification objective to search and focus specimen firstly, then replace with higher magnification objective if necessary.
When replacing the objective, slowly turn the nosepiece until you hear "clicked", that means the objective is in place.
3.2.4Mounting the filters
1. Open the condenser carriage①;
2. Place the required filter②into the condenser,then close the condenser carriage。
The filter of the standard outfit is green and baby blue.
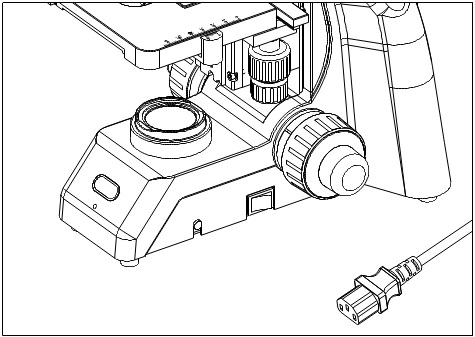
Figure 8
3.2.4Connecting the Power Cord
The cable and cords are vulnerable when bent or twisted, never subject the power cord to excessive force.
1. Set the main switch①o "O" (off) state before connecting the power cord.。
2. Insert the plugs②into the power jack③f the microscope safely.
3. Plug the power cord④into the power supply receptacle⑤. Make sure the connection is well.
Do use the supplied power cord all the time. If lost or damaged, select the same standard cord, please.
A wide range of voltage ,like 100V~240V, is acceptable for this microscope.
3.2.5Replacing the fuseDo remember to set the main switch①to the state "O" (OFF) and unplug the power cord before replacing the fuse. Rotate the fuseout of the holder③, replace with a new fuse, then rotate it back to the holder again.
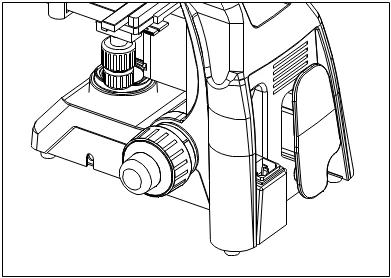
Figure 9
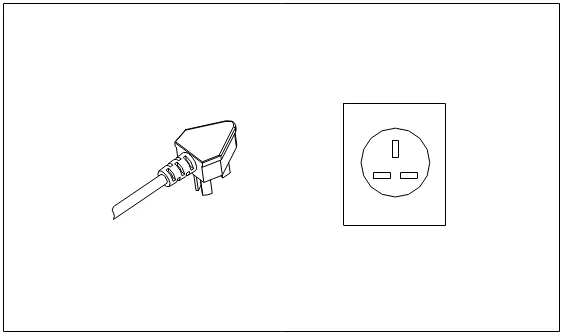
Figure 10
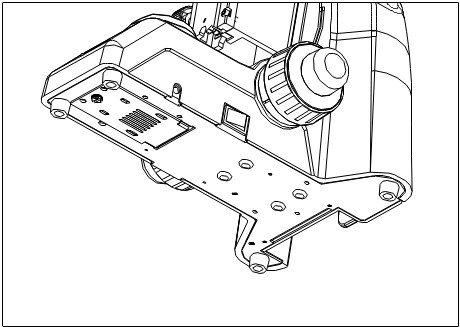
Figure 11
2.8Installing and Replacing the bulb
Please use the specified halogen Lamp 6V20W.
1. Loosing the screw①。
2. Hold the bulb②after you wrap it with gauze or other protection materials, and then insert its pin deeply into the jack in the lamp holder.
3. During microscope using or soon after it is turned off, the bulb, the lamp house and nearby parts will be very hot and will cause serious burns. Please turn the main switch to"O" (off) and disconnect the power plug, and make sure the bulb, the lamp room and periphery are all cool. Then, you can do your replacing.
Insert the bulb gently. Squeezing too hard will damage the bulb.
To prevent reduced bulb life or cracking, do not touch the bulb with bare hands. If fingerprints are accidentally left on the bulb, wipe the bulb with a soft cloth.
4. Adjustment and operation
4.1 Adjustment set diagram
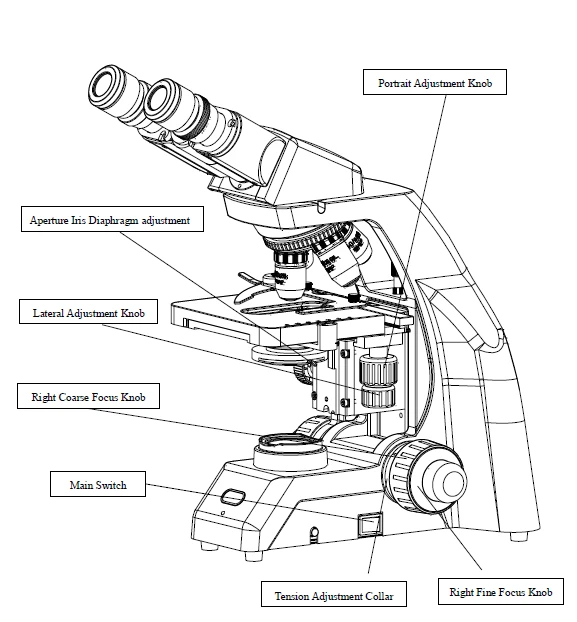
Figure 12
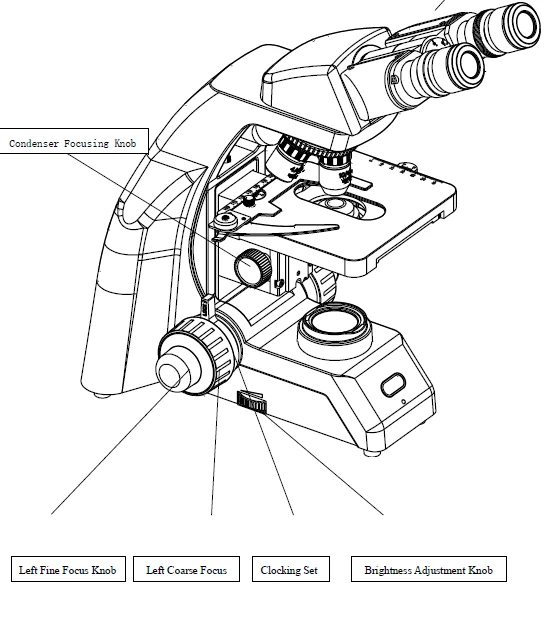
Figure 13
4.2 Adjustment and Operation
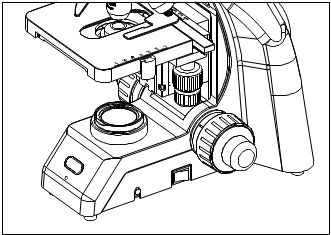
Figure 14
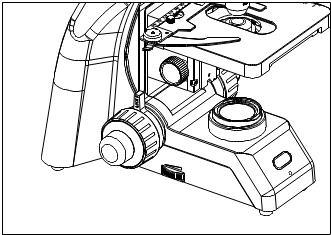
Figure 15
4.2.1Brightness Adjustment
1. Connect the power cord and set the main switch① to "-"state (ON).
2. Turning the brightness adjustment knob ②.
4.2.2Placing the Specimen
1. Place the specimen the center of the mechanical stage and use the stage clips to clamp it.
2. Turn the portrait and lateral adjustment knob①of the mechanical ruler, move the specimen to the required position.
Be careful when changing the objective. If you finish the observation with the short working distance objective, and want to change another one, becareful of not letting the objective touch the specimen.
4.2.3Focusing the Specimen
1.Focus the specimen with 10X objective. To avoid the objective touching the specimen during focusing, you should raise the mechanical stage to let the specimen close to the objective at first, then slowly separate them to bring the specimen to focus.
Turn the coarse focus knob①conversely to lower the specimen and search images in the 10xocular simultaneously, and thenuse the fine knob② to focus. After that, you can replace with other magnification objectives safely, and focus without the risk of damaging the specimen.
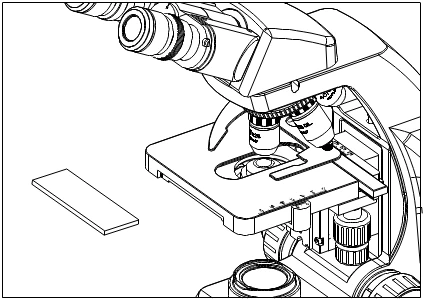
Figure 16
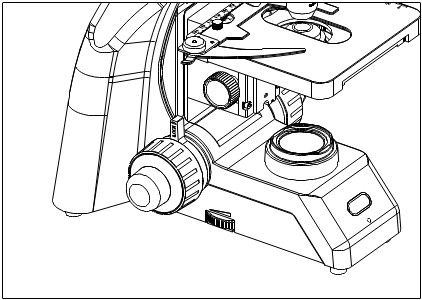
Figure 17
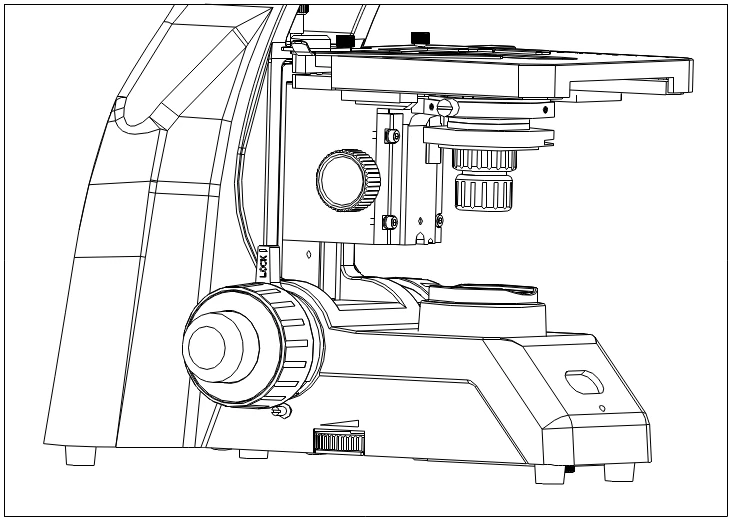
Figure 18
4.2.4Condenser Adjustment
Turn the condenser focus knob①to move the condenser up and down.Raise the condenser when using the high magnification objective, and descend it when using the low magnification one.
1. Focus the specimen with 10x objective.
2. Adjust the condenser focus knob①to get a clear image of the field iris diaphragm.
3. Turn the condenser centering knobs②to center the image of field iris diaphragm in the field of view.
The condenser and the objective are coaxial. It has been adjusted before leaving factory, so the user needn't to adjust them by self
The highest position of the condenser has been adjusted too. It also needn't any user's operation. (The top surface of the condenser is 0.03mm-0.4mm lower than the stage top surface.)
4.2.5 Aperture
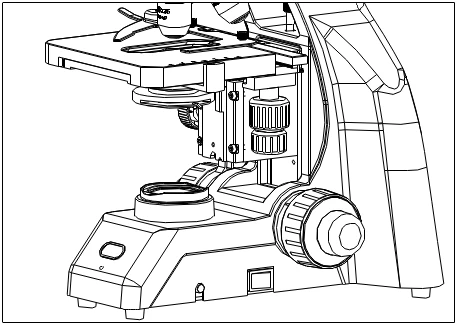
Figure 19
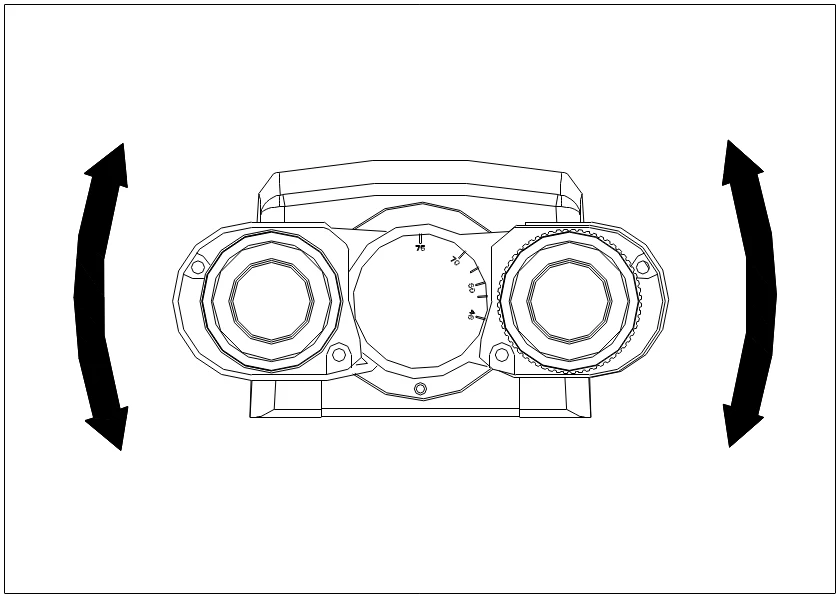
Figure 20
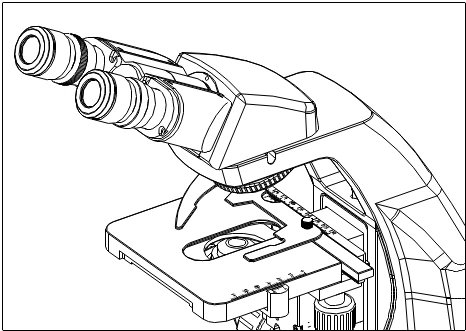
Figure 21
4.2.6Adjusting the Interpupillary Distance
The interpupillary distance range:55mm~75mm。
While looking through the eyepieces, move both eyepieces round until the left and right fields of view coincide completely.
4.2.7Adjusting the Diopter
1. Turn the eyepiece①to adjust the diopter while looking through it.
The diopter range of the eyepiece is±5 diopter.The number aligned to the line on the viewing head is the diopter in use.
4.2.8Adjusting the tension adjustment collar
Turn the tension adjustment collar①with your fingers.When the collar is turned in the direction of the arrow, the tension of the coarse adjustment knob② increases. Turning the collar in the opposite direction decreases the tension.
If the nosepiece descends on its own or if the specimen gets out of focus quickly even when it is brought into focus using the fine adjustment knob③, it means the tension of the coarse adjustment knob is too low. Turn the collar in the direction of the arrow to increase the tension.
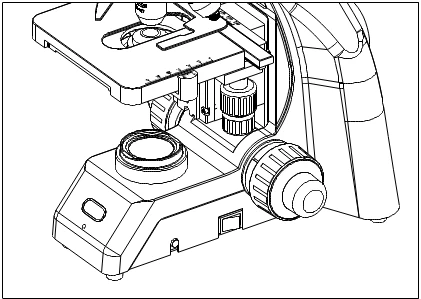
Figure 22
Figure 22
4.2.9Adjusting the Interpupillary DistanceThe microscope with ECO:
The equipment can induct the front surroundings in 1m. At the moment, it light red and light source keeping working.
When people left and no object within the front 1m, the red light would flashed. After 15 minutes, light source stop working.
5. Technical Specifications
5.1 Main Specifications
Optical System | Limited optical system/Infinite optical system |
Viewing Head | Seidentopf Binocular Head, 30°Inclined,Interpupillary Distance 48-75 mm |
Eyepiece | WF 10X/18/WF 10X/20 |
Nosepiece | Backward Quadruple Nosepiece |
Objective | Achromatic Objective/Infinite Semi-plan Objective4x,10x,40x,100x |
Focusing | Coaxial Coarse and Fine Adjustment, Moving Range 0.002mm,Fine Division 20mm |
Condenser | Abbe Condenser,NA1.25 |
Stage | Double Layers Mechanical Stage160x140,Moving Range74x50 |
TimingBelt Stage150x139mm,Moving Range 75x52mm | |
Illumination | 1W S-LED /6V20W Halogen Lamp |
Table 1
5.2 Eyepiece and objectives
5.2.1 Achromatic Objective
Magnification | NumericalAperture(NA) | Focal Length(mm) | Focal distance(mm) | Working Length(mm) | Objective |
4x | 0.10 | 0.17 | 31.05 | 37.5 | dry |
10x | 0.25 | 0.17 | 17.13 | 7.316 | dry |
40x | 0.65 | 0.17 | 4.65 | 0.632 | dry |
100x | 1.25 | 0.17 | 2.906 | 0.198 | oil |
Table 2
5.2.2 Infinite Semi-plan Objective
Magnification | Numerical Aperture(NA) | Focal Length(mm) | Focal distance(mm) | Working Length(mm) | Objective |
4x | 0.10 | 0.17 | 45 | 16.8 | dry |
10x | 0.25 | 0.17 | 18 | 5.8 | dry |
40x | 0.65 | 0.17 | 4.5 | 1.43 | dry |
100x | 1.25 | 0.17 | 1.8 | 0.13 | oil |
Table 3
5.2.3 Eyepiece
Eyepiece | Magnification | Focal Length(mm) | Field of View(mm) |
Wide field eyepiece | 10x | 24.95 | Φ18 |
Wide field eyepiece | 10x | 25 | Φ20 |
Table 4
5.2.4 Total Magnification
Eyepiece | 10x | 10x | 10x | 10x |
Objective | 4x | 10x | 40x | 100x |
Total Magnification | 40x | 100x | 400x | 1000x |
Table 5
6. Outfit
Item | Specification | Quantity | Standard Outfit |
NE125 | |||
Main Body | Main Standard | 1 | • |
Main Standard(battery charging) | 1 | ○ | |
Main Standard(ECO) | 1 | ○ | |
Double Layers Mechanical Stage | 1 | • | |
Condenser Holder | 1 | • | |
Viewing Head | Seidentopf Binocular Head | 1 | • |
Seidentopf Trinocular Head | 1 | ○ | |
Condenser | Abbe Condenser, NA=1.25 | 1 | • |
Nosepiece | Backward Quadruple Nosepiece | 1 | • |
Illumination | 1W SLED | 1 | • |
6V20WHalogen Lamp | 1 | ○ | |
Blue, GreenFilter | 1 each | 〇 | |
Spare Fuse 50T250V 500mA | 2 | • | |
Eyepiece | 10xWide Field Plan Eyepiece | 2 | • |
Objective | Achromatic Objective4x | 1 | • |
Achromatic Objective10x | 1 | • | |
Achromatic Objective40x | 1 | • | |
Achromatic Objective100x(Oil, Spring) | 1 | • |
Table 6
Note:"•"Standard Outfit, ○"optional
Item | Specification | Quantity | Standard Outfit |
NE126 | |||
Main Body | Main Standard | 1 | • |
Main Standard(battery charging) | 1 | ○ | |
Main Standard(ECO) | 1 | ○ | |
Synchrone Belt Stage | 1 | • | |
Condenser Holder | 1 | • | |
Viewing Head | Infinite Seidentopf Binocular Head | 1 | • |
Infinite Seidentopf Trinocular Head | 1 | ○ | |
Condenser | Abbe Condenser, NA=1.25 | 1 | • |
Nosepiece | Backward Quadruple Nosepiece | 1 | • |
Illumination | 1W SLED | 1 | • |
6V20WHalogen Lamp | 1 | ○ | |
Blue, GreenFilter | 1 each | 〇 | |
Spare Fuse 50T250V 500mA | 2 | • | |
Eyepiece | 10xWide Field Plan Eyepiece | 2 | • |
Objective | Infinite Semi-plan Objective4x | 1 | • |
Infinite Semi-plan Objective10x | 1 | • | |
Infinite Semi-plan Objective40x | 1 | • | |
Infinite Semi-plan Objective100x(Oil, Spring) | 1 | • |
Table 7
Note:"•"Standard Outfit, ○"optional
7. Troubleshooting Guide
7.1 Optical System
TROUBLE | CAUSE | SOLUTION |
1. The edge of the field of view is dark or the brightness is not uniform | The nosepiece is not in the located position (objective and light path not coaxial) | Locate the nosepiece properly where it clicks |
The surface of the lamp becomes black | Change a new lamp bulb | |
A lens (the objective, condenser, eyepiece or collector) is dirty. | Clean it thoroughly | |
2. Dirt or dust is visible in the field of view | Dirt/dust on the specimen | Replace with a clean specimen |
Dirt/dust on the eyepieces | Clean them | |
3. Visibility is poor Image is not sharp; Contrast is poor; Details are indistinct | Specimen is not covered | Add cover glass on it |
The thickness of the cover glass is not suitable | Use standard cover glass with thickness of 0.17mm | |
Specimen is placed reversely | Turn it over | |
Dry objective has oil on it. (especially for 40X objectives) | Wipe the oil | |
A lens (the objective, condenser, eyepiece or collector) is dirty. | Clean it | |
Immersion oil is not used with the 100x objective | Use specified oil | |
Air bubbles existed in the immersion oil | Eliminate the bubble | |
The aperture iris diaphragm is stopped down too far | Adjust the aperture iris diaphragm properly | |
Dirt or dust on the eyepiece | Clean it | |
4. One side of image is blurred | Condenser is not properly centered | Center the condenser with the centering screw |
The nosepiece is not properly engaged | Engage the nosepiece properly | |
The specimen is not clamped | Clamp it with stage clips | |
5. The brightness is not enough | The aperture iris diaphragm is too small | Adjust it properly |
The condenser is too low | Adjust it properly | |
A lens (the objective, condenser, eyepiece or collector) is dirty. | Clean it |
Table 8
7.2 Mechanical System
TROUBLE | CAUSE | SOLUTION |
1.Field of view of one eye does not match that of the other | Interpupillary distance is incorrect | Adjust interpupillary distance |
2. Observation is tiring | The diopter is not proper | Adjust the diopter properly |
The brightness of the illumination is not proper for eyes | Adjust the lamp voltage |
Table 9
7.3 Electrical System
TROUBLE | CAUSE | SOLUTION |
1.The bulb cannot light | No power supply | Check the power cord connection |
The pin of the bulb doesn't insert properly | Insert the pin deeply | |
The bulb broken | Replace with a new one | |
2. The bulb burns out suddenly | The bulb is not the specified one; The voltage is too high | Use the specified bulb; lower the voltage |
3. the illumination is not bright enough | the voltage is too low | Raise the voltage |
4. Image flicks | The bulb is about to burn out | Replace with a new one |
The bulb is not inserted deeply | Check its connection |
Table 10