Get Price
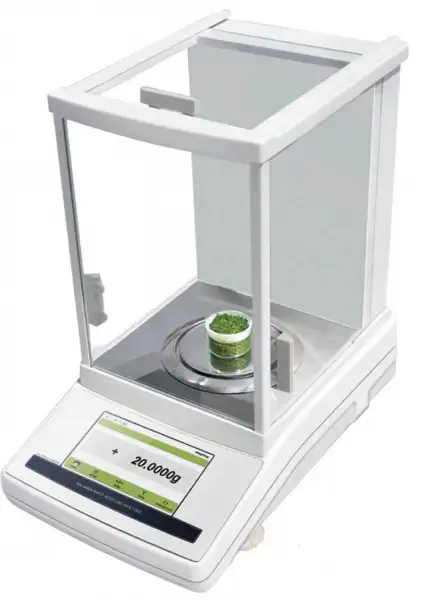
Analytical Balance BBAL-111
- Internal auto calibration
- 5 Inch touch screen
- One key / Time trigger internal calibration
- Electromagnetic force sensor
- Aluminum shell / Large space wind proof cover
- Tare function / Counting / Density / Percentage
- Unit conversion (g/mg/ct/oz...)
- Under weighing
 Get Quote
Specifications
| Model | BBAL-111 |
| Capacity | 200g |
| Readability | 0.0001g |
| Min Weighing | 0.0004g |
| Repeatability | ±0.0002g |
| Linearity | ±0.0003g |
| Stable Time | ≤3s |
| Pan Size | Φ80mm |
| Appearance Size | 365*210*355mm |
| Draft Shield Size | 175*165*230mm (Inner diameter) |
| Communication | RS232 (Standard) USB (Option) |
| Temperature | 15-35°C |
| Calibration | Internal calibration |
| Cal. Weight | 200g |
| Option | Printer |
| Packing Size | Inside:440*295*430mm Outside:490*335*485mm |
| Gross Weight | 11kg |
Features
5 Inch touch screen
One key / Time trigger internal calibration
Electromagnetic force sensor
Aluminum shell / Large space wind proof cover
Tare function / Counting / Density / Percentage
Unit conversion (g/mg/ct/oz...)
Under weighing
Sensitivity / Speed set
Overload alarm / Fault alarm / Level indicator
Option: Density kit (Solid / Liquid)


Applications

Gold jewelry

High precision data matching

Scientific experiment

Medicine
Accessories For Purchase
| Images | Name | Description | Information |
    | Weight set | Recommend corresponding accuracy calibration (1mg-20kg) | M1 levelSuitable for 0.1g-0.01g F2 levelSuitable for 0.01g-0.001g F1 levelSuitable for 0.001g-0.0001g E2 levelSuitable for over 0.0001g |
  | Weight set | Lock type series weights (5kg-20kg) | M1 levelSuitable for 0.1g-0.01g F2 levelSuitable for 0.01g-0.001g F1 levelSuitable for 0.001g-0.0001g |
Operating Manuals
 Download Manual (PDF)
1. KNOW YOUR BALANCE
2. SPECIFICATIONS
3. UNPACKING THE BALANCE
4. CALIBRATION THE BALANCE
5. LOCATING THE BALANCE
6. SETTING UP THE BALANCE
6.1 ASSEMBLING THE BALANCE
6.2 LEVELLING THE BALANCE
7. OPERATION SETTINGS
7.1 SENSITIVITY SETTING
7.2 SPEED SETTING
7.3 WEIGHING UNIT SETTING
7.4 COUNTING FUNCTION
7.5 PERCENTAGE FUNCTION
7.6 DENSITY FUNCTION
8. FAULT JUDGMENT
9. DATA OUTPUT
1. KNOW YOUR BALANCE
Thank you for selecting the Analytical Balance.
This Instruction Manual will guide you of the installation, accessories, trouble-shooting, after sales service information, general maintenance of the balance, etc. it will also guide you through the various applications.
Please read this Manual thoroughly before starting the operations. If you need any clarifications, feel free to contact us.
This balances are ideal for laboratory and general purpose weighing. The balances can also be used for some advanced weighing functions.

Figure 1
Features:
Stainless Steel Pan
Super bright LCD display with backlight
RS232 Interface
Adapter supplied as standard
Windshield supplied as standard
Height adjustable feet, Bubble Level
Internal Auto Calibration
Selectable measure units, g, oz, ct,mg
Memory for accumulated time
Weighing function
Piece counting function
Below balance weighing
Applications:
Weighing
Net weight / tare
Below balance
weighing Piece
counting function
Density Test
Percentage Test
2. SPECIFICATIONS
Model | BBAL-111 |
Range | 0-200g |
Division | 0.1mg |
Repeatability | 0.2mg |
Linearity | 0.5mg |
Resp. Time | ≤ 4 Sec. |
Pan Size | Ø80mm |
Interface | RS-232 bi-directional |
Overall Dimensions | 340 x 215 x 350mm |
Operating temperature | +10°C to 40°C |
Power Supply | Output voltage 5 VDC, 600mA through External Power Adapter as standard (Input Voltage220 V) |
Net Weight | 8.5 kg |
Table 1
3. UNPACKING THE BALANCE
Remove the balance from the packing by carefully lifting it out of the box. Inside the box you will find everything needed to start using the balance
4. CALIBRATION THE BALANCE
Press"CAL" key, and it will show and shining: CAL-XXX.XXXX,and the balance begin internal calibration.
You also can choose manual calibration with standard weight, and there will have the notes tell you step by step:

Figure 2
5. LOCATING THE BALANCE
◦ The balance should not be placed in a location that will reduce the accuracy.
◦ Avoid extremes of temperature. Do not place in direct sunlight or near air conditioning vents.
◦ Avoid unsuitable tables. The table or floor must be rigid and not vibrate.
◦ Avoid unstable power sources. Do not use near large users of electricity such as welding equipment or large motors.
◦ Do not place near vibrating machinery.
◦ Avoid high humidity that might cause condensation. Avoid direct contact with water. Do not spray or immerse the balances in water.
◦ Avoid air movement such as from fans or opening doors. Do not place near open windows or air-conditioning vents.
◦ Keep the balance clean. Do not stack material on the balances when they are not in use.
6. SETTING UP THE BALANCE
6.1 ASSEMBLING THE BALANCE
▪ Locate balance on solid surface, free from vibration
▪ Open the sliding door and gently place the stainless steel top.
▪ Level balance using the adjustable feet and the bubble level
▪ Connect the power to the balance
▪ For best performance, let the balance warm up for 30-60 min. and calibrate before using
6.2 LEVELLING THE BALANCE
After placing the balance in a suitable place, level it by using the bubble level. To level the balance turn the two adjustable feet at the rear of the balance until the bubble in the bubble level is center.
7. OPERATION SETTINGS

Figure 3
1.State Icon
2. Function State
3.Weighing Digits
4.Notes
5.Operation Keys
7.1 SENSITIVITY SETTING
 -Highest Sensitivity
 -Normal Sensitivity
 -Sensitivity

Figure 4
7.2 SPEED SETTING
 -Highest Speed
 -Normal Speed
 -Low Speed

Figure 5
7.3 WEIGHING UNIT SETTING
Under the weighing state, press "CONVERSION" to choose the unit. There are 4 units :g/ct/oz/mg.
7.4 COUNTING FUNCTION
There are counting functions in the balance, And please keep the products have the same weight, and the minimum weight must be ≥0.5mg.

Figure 6
1.Choose the sample quantity which you will put on the pan
2.Touch the weighing value you want weighing,here is the sample weight,after the weighing stable touch again, the result will check and store.
3.Touch here and weighing the total weight, and touch again to check the weight.
4.The quantity will be show here.
7.5 PERCENTAGE FUNCTION
Check the weight percentage function:

Figure 7
1. Choose the 100% which you will put on the pan
2. Touch the weighing value you want weighing,here is the sample weight,after the weighing stable touch again, the result will check and store.
3. Touch here and weighing the total weight, and touch again check the weight.
4. The percentage will be show here.
7.6 DENSITY FUNCTION
Same operation with counting function,just touch the air weight and weighing in the air, then weighing in the liquid, the result will show in the display.

Figure 8
8. FAULT JUDGMENT
If you come across any problem, you can check it by you self and find the reasons.
FAULT | REASON | EXCLUDE |
No display | Not connected to the power supply; Fuse is broken; Power transformer damage; | Plug in the power line; Replace the fuse; Replacement of power transformer; Contact factory |
Weighing unstable | Bad working conditions; The wind screen is open; Something between the table and balance; The power unstable; Weighing unstable; | Keep the environment stable,close the windows and doors; Close the glass door; Take away the things; Connect the stable power; |
The weighing digitsis wrong | The balance not calibration. Not tare before weighing. No adjust the level. | Calibration. Tare before weighing. Adjust the level feet. |
Table 2

Figure 9
9. DATA OUTPUT
1 | Model or a decimal point |
2 | A space or a decimal point |
3 | A space or * |
4 | + or - or a decimal point |
5 | data |
6 | Data or a decimal point |
7 | Data or a decimal point |
8 | Data or a decimal point |
9 | Data or a decimal point |
10 | Data or a decimal point |
11 | Data or a decimal point |
12 | Data |
13 | Unit 1 |
14 | Unit 2 |
15 | Unit 3 |
16 | Enter |
17 | Wrap |
Table 3

Figure 10
We can choose the suitable baud rate and communication style for different print or connect with the computer